

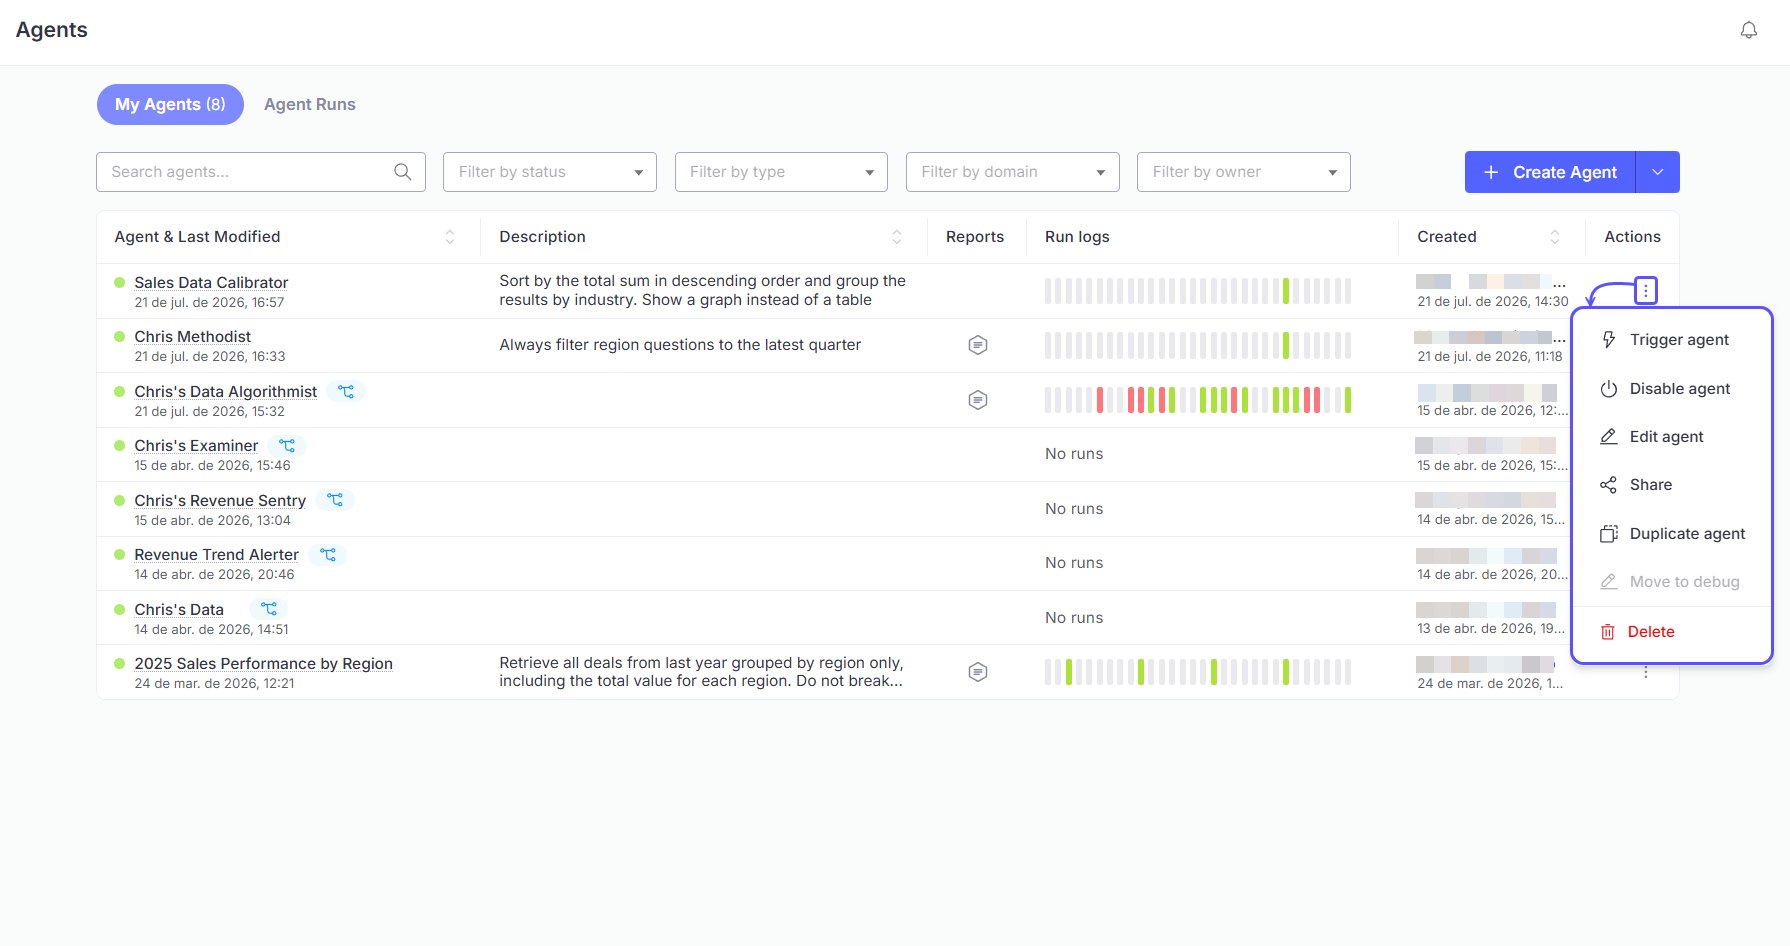
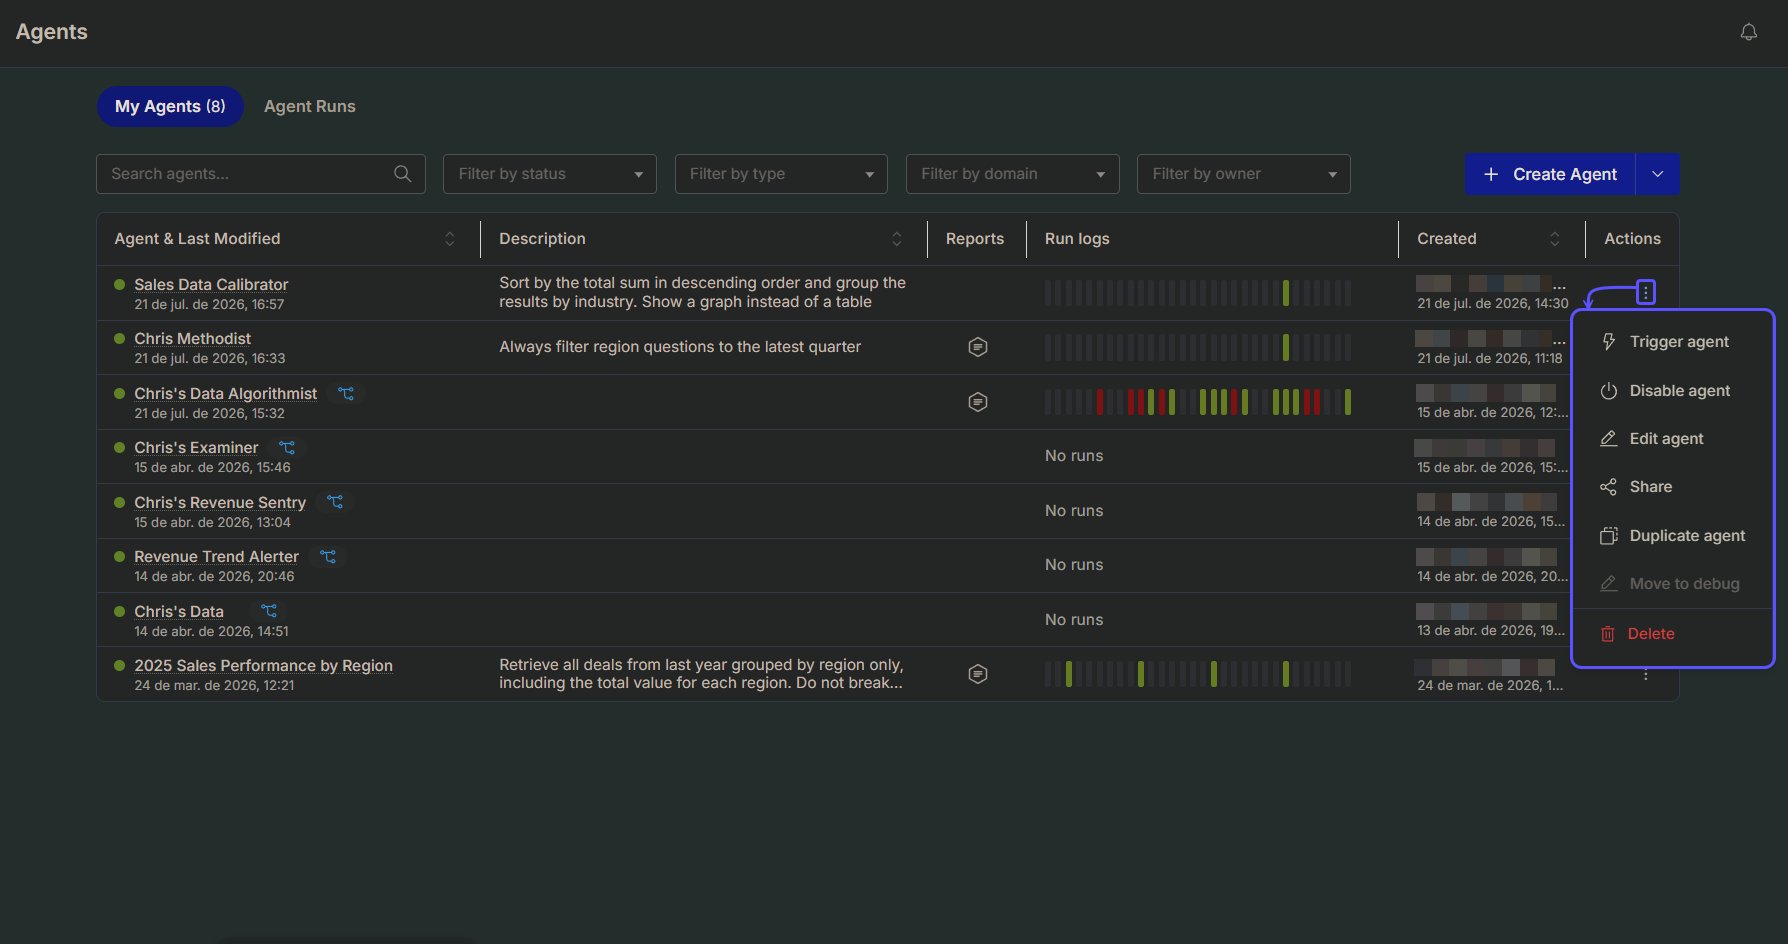
- Trigger agent: Manually runs the Agent’s entire workflow. The Agent will evaluate its trigger (if enabled) and, if the conditions are met (or if the trigger is disabled), run the full analysis and send a notification.
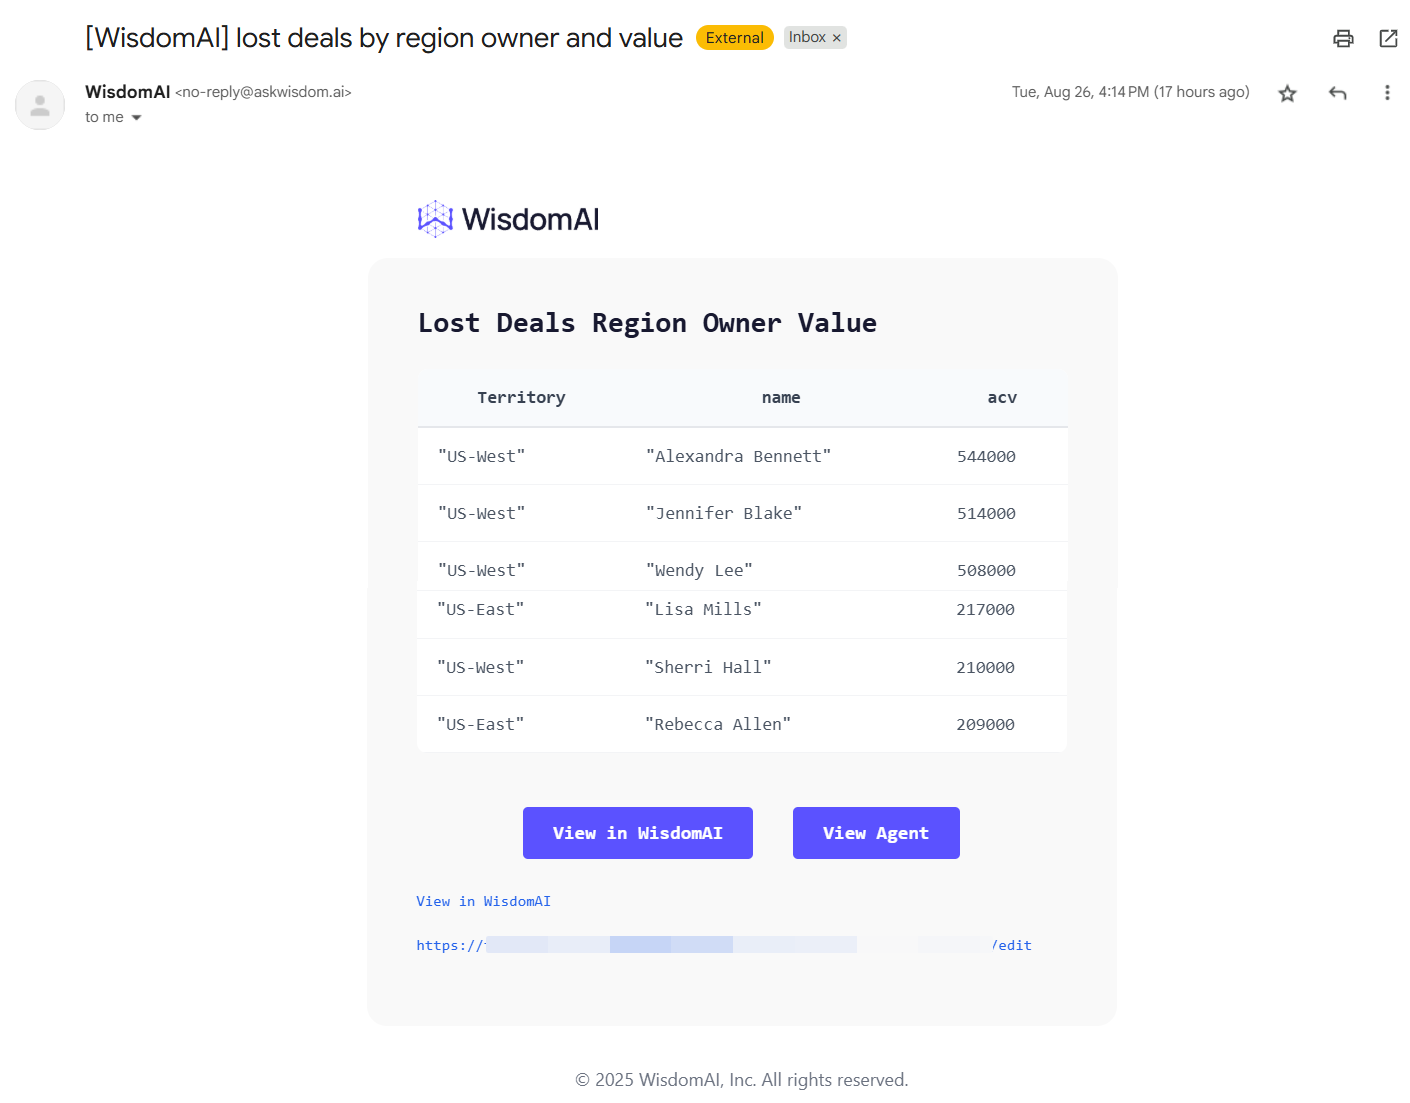
Once you get the notification, you will be able to:
- View in WisdomAI: it takes you to the chat window.
- View Agent: it takes you to the agent configuration page.
- Enable agent / Disable agent: Toggles the agent between the Active and Inactive states. Disabling an agent stops it from running on its schedule; enabling it resumes normal runs and notifications. See Agent states below.
- Edit agent: Opens the canvas for Visual agents, allowing you to modify the Agent’s name, trigger, work description, or schedule.
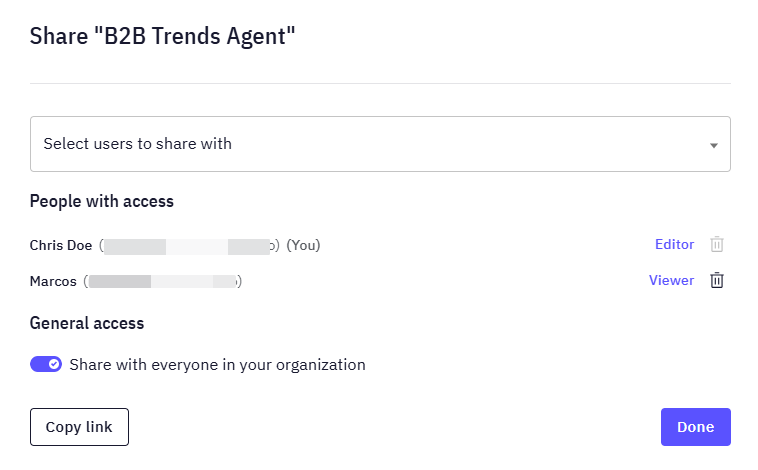
- Share: Allows you to share the Agent with other users for collaboration.
- Manage access: grant Editor or Viewer access for that agent.
- Manage general access: share it with everyone in your organization.
- Duplicate agent: Creates a copy of the agent that you can edit independently, without affecting the original.
- Move to debug: Switches the agent to the Debug state. The agent still runs on its schedule and produces output, but doesn’t send notifications to subscribers. Use this to validate changes against live data without alerting your team.
- Delete: Permanently removes the Agent. This action cannot be undone.
View previous Runs
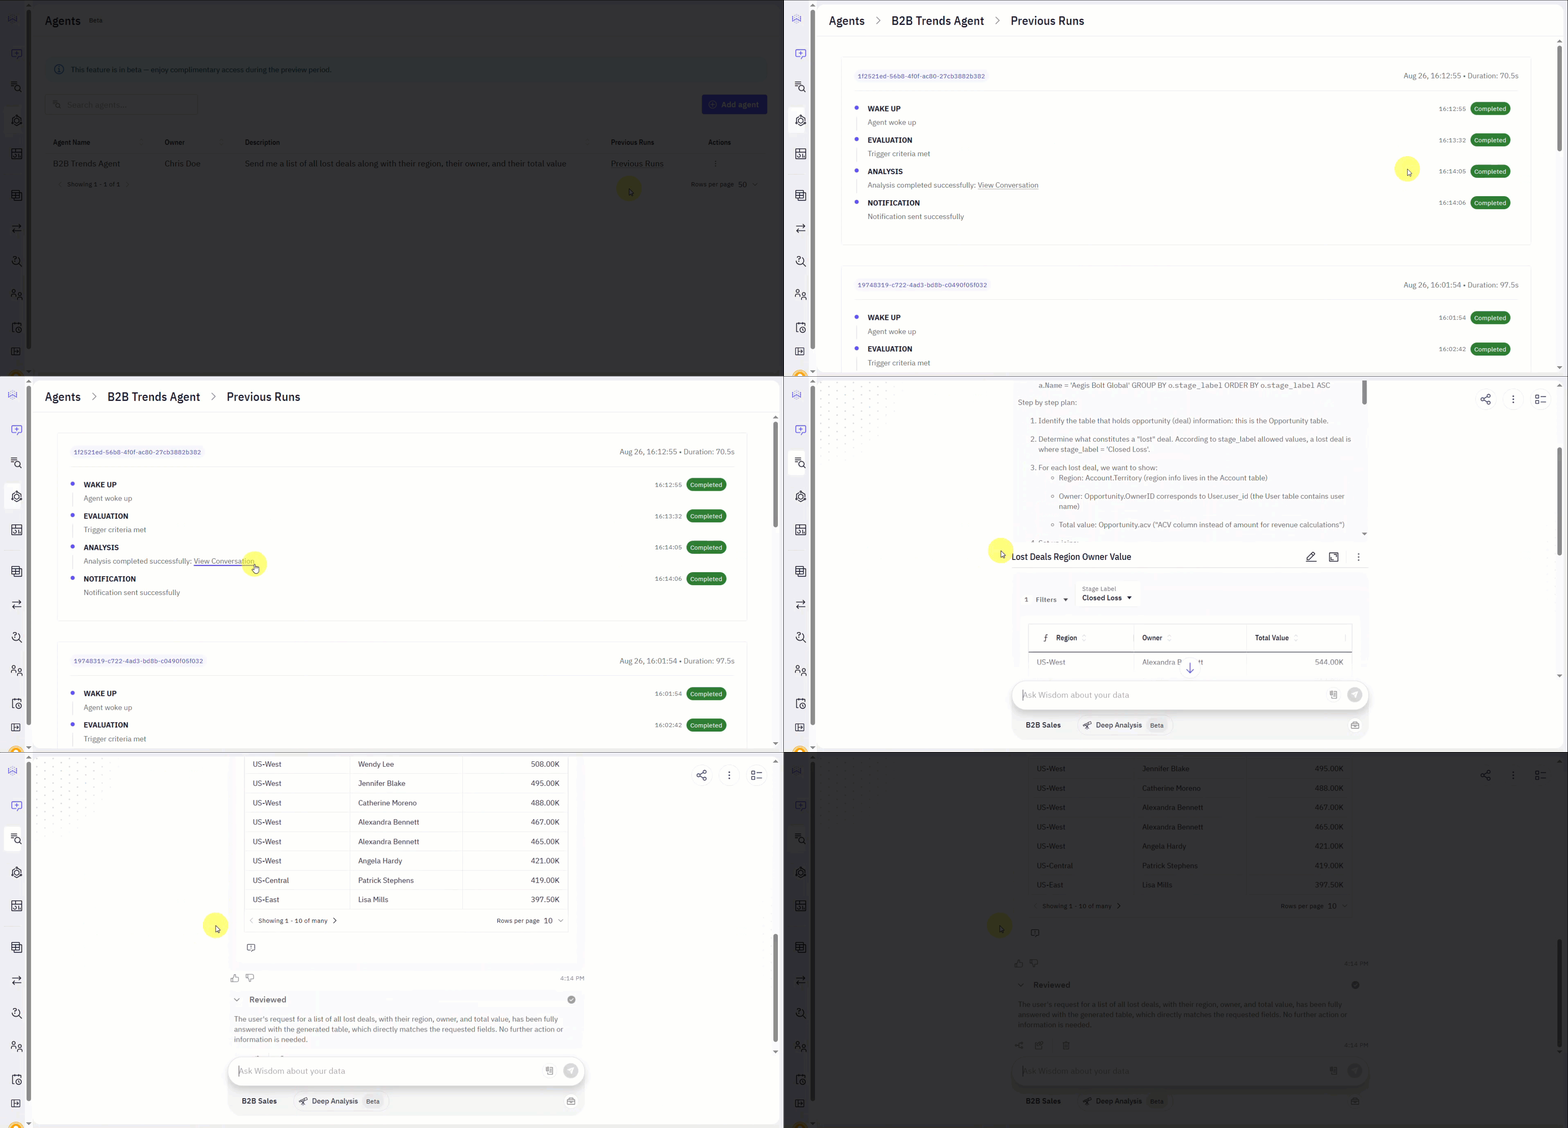
You can view a detailed history of every time an agent has run. This log is useful for auditing and debugging an agent’s behavior over time.- To see the log, find your agent on the Agents page and click the Previous Runs link in its corresponding row.
- This will take you to the Previous Runs page, which displays a timeline of all past executions. Each entry in the log shows the status of the agent’s key stages:
Visual Agents log each run per node. You can replay any run on the canvas to review the status of each node.
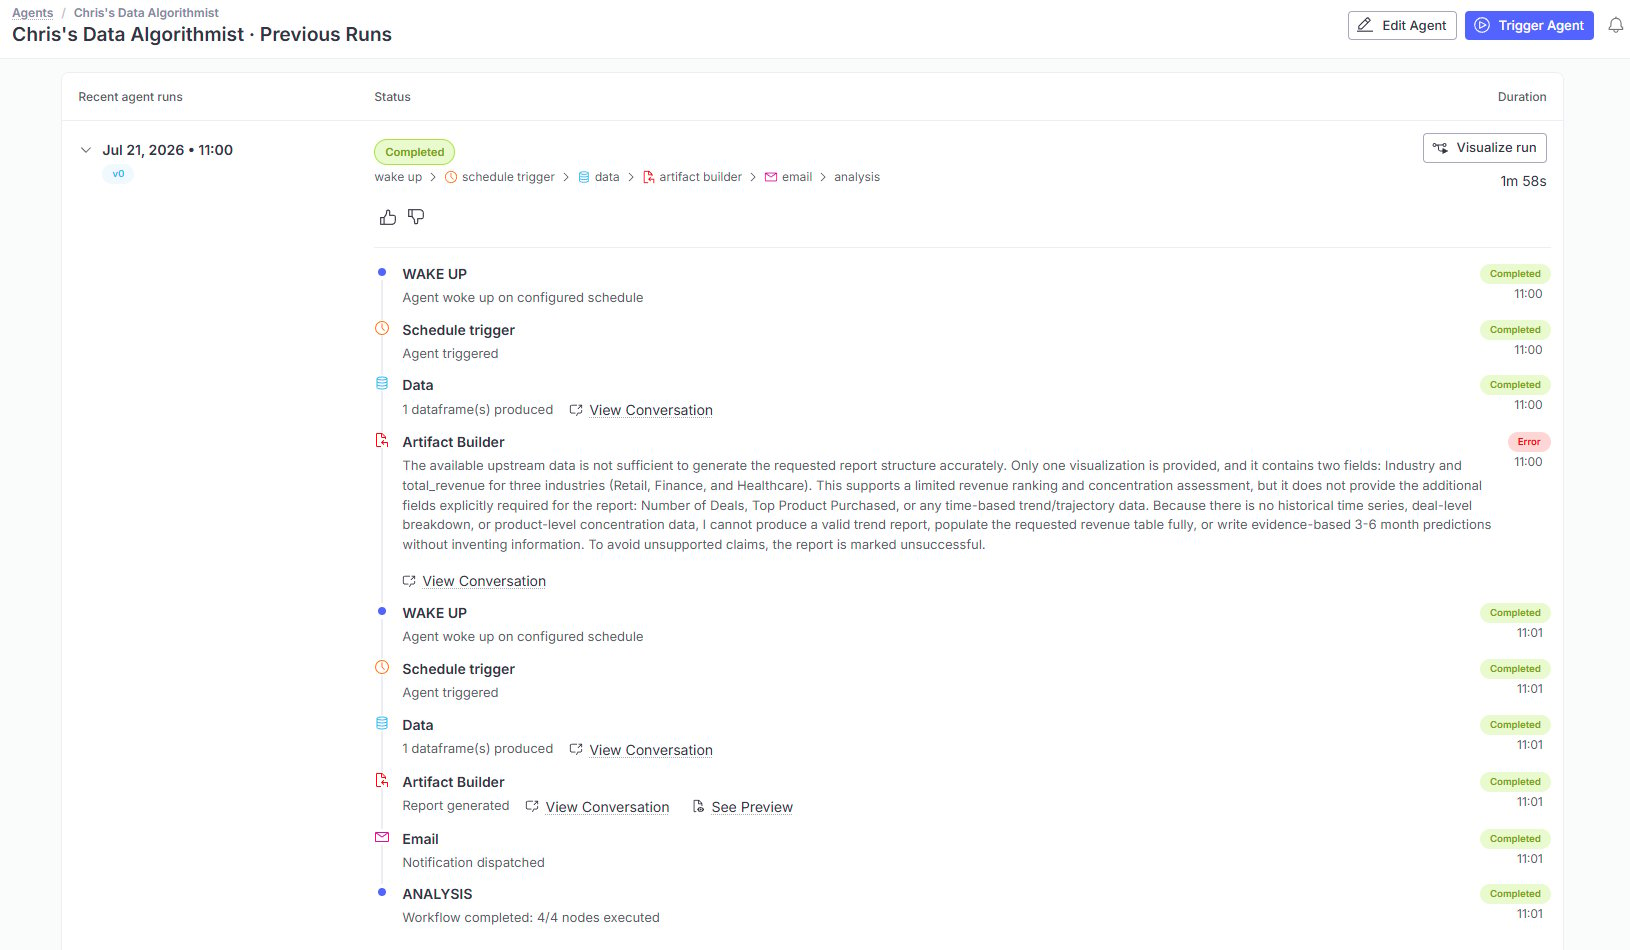
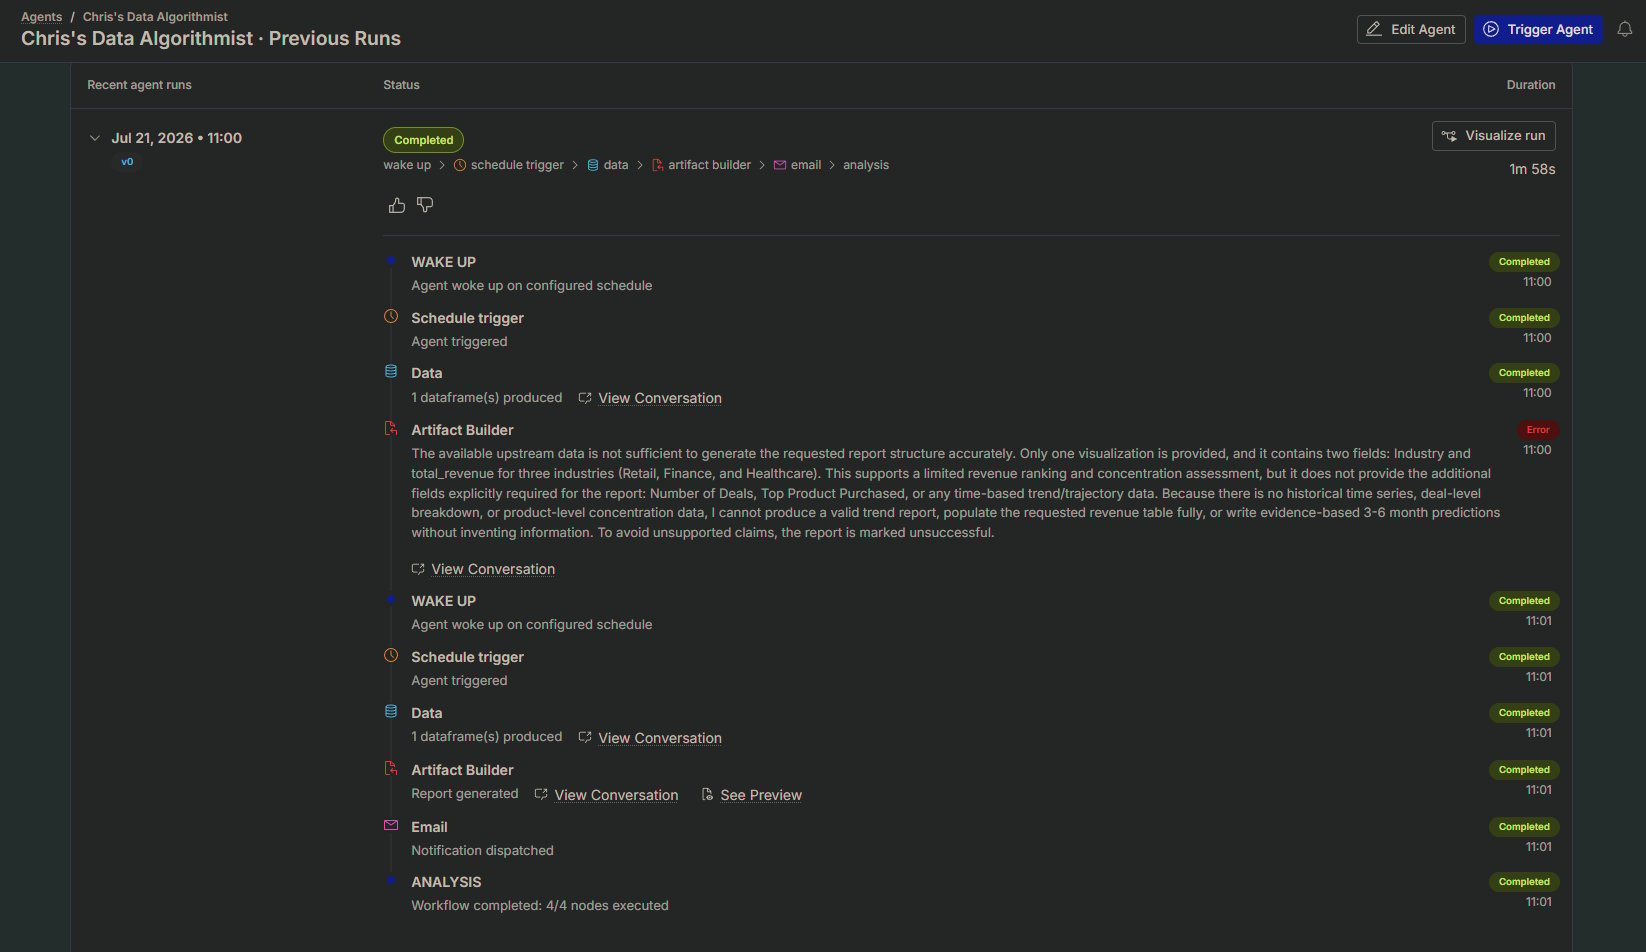
- If an analysis was successfully generated, you can click the View Conversation button within the ANALYSIS step. This will take you to the specific conversation where you can inspect the detailed results and the exact query that was run for that execution.
RBAC
Use Role-Based Access Control (RBAC) to manage collaboration. Refer to the table below to understand the differences between Editor and Viewer permissions and how they respect existing data access rules.Agent states
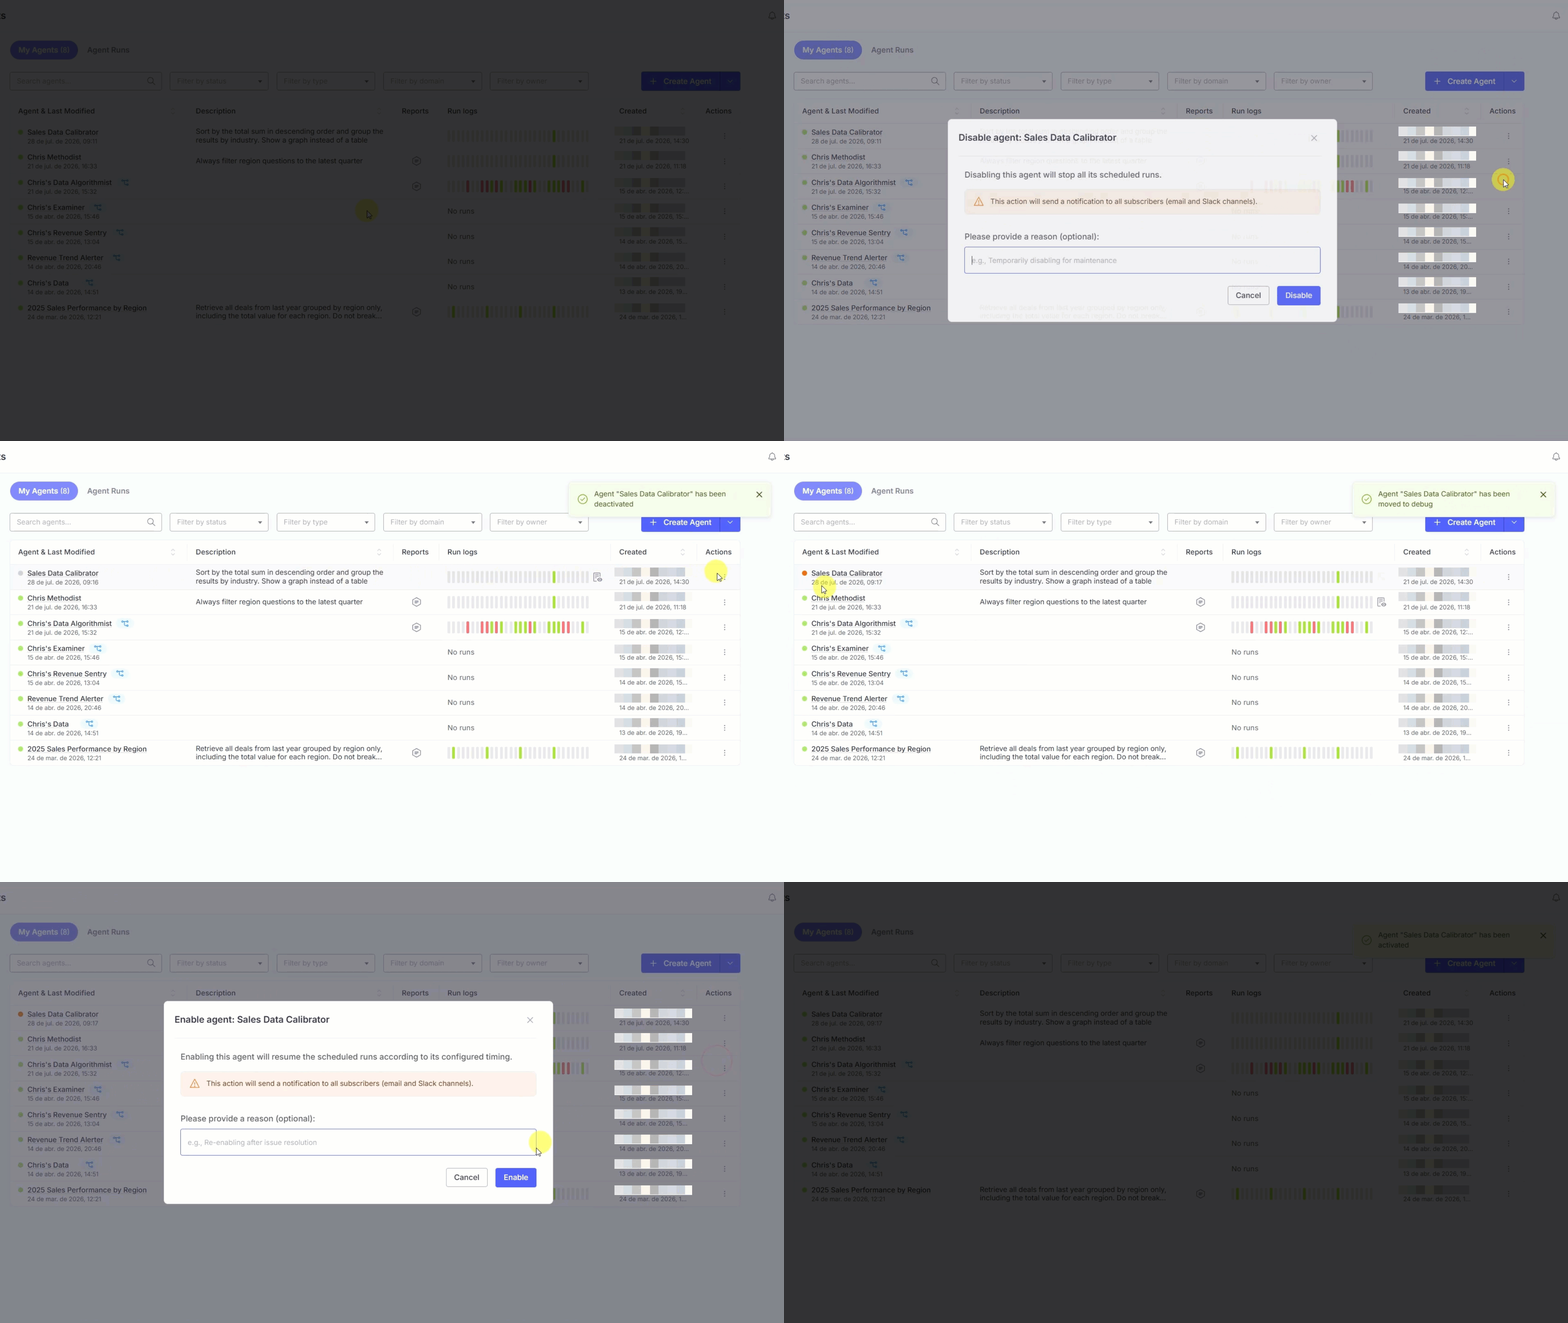
Every agent is always in one of three states, shown next to its name on the Agents page:- Active: The agent runs normally and delivers notifications to its configured channel.
- Inactive: The agent doesn’t run at all, scheduled or otherwise.
- Debug: The agent still runs on its schedule and produces output, but doesn’t notify subscribers. Use this state to validate changes against live data without alerting your team.
Changing an agent’s state
From the agent’s three-dot menu, you can select Enable agent, Disable agent, or Move to debug to change its state:- An agent can only be moved to Debug from the Inactive state. Otherwise, Move to debug is greyed out.
- Trigger agent is also disabled while the agent is Inactive.
Reports
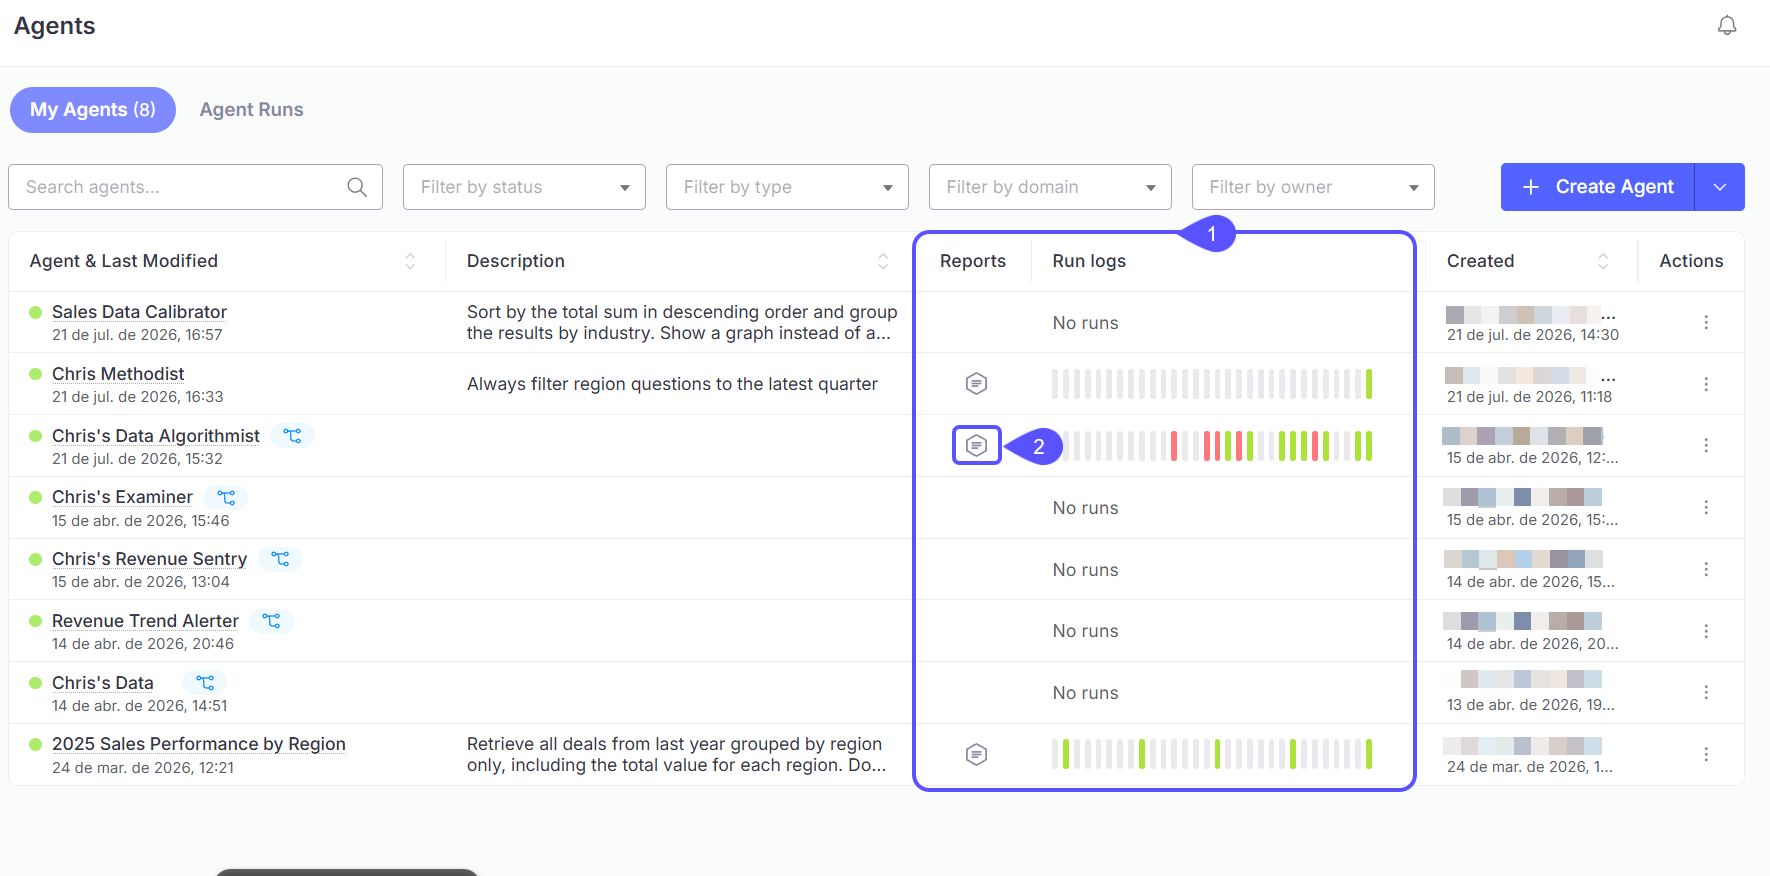
Each agent has a Reports list of its generated artifacts, with an Export to PDF action. (DOCX export is available via the API.) To view an agent’s reports:- On the Agents page, find the Reports column. Agents that have generated at least one report show an icon there, agents with no runs yet show none.
- Click the icon to open that agent’s Reports list.
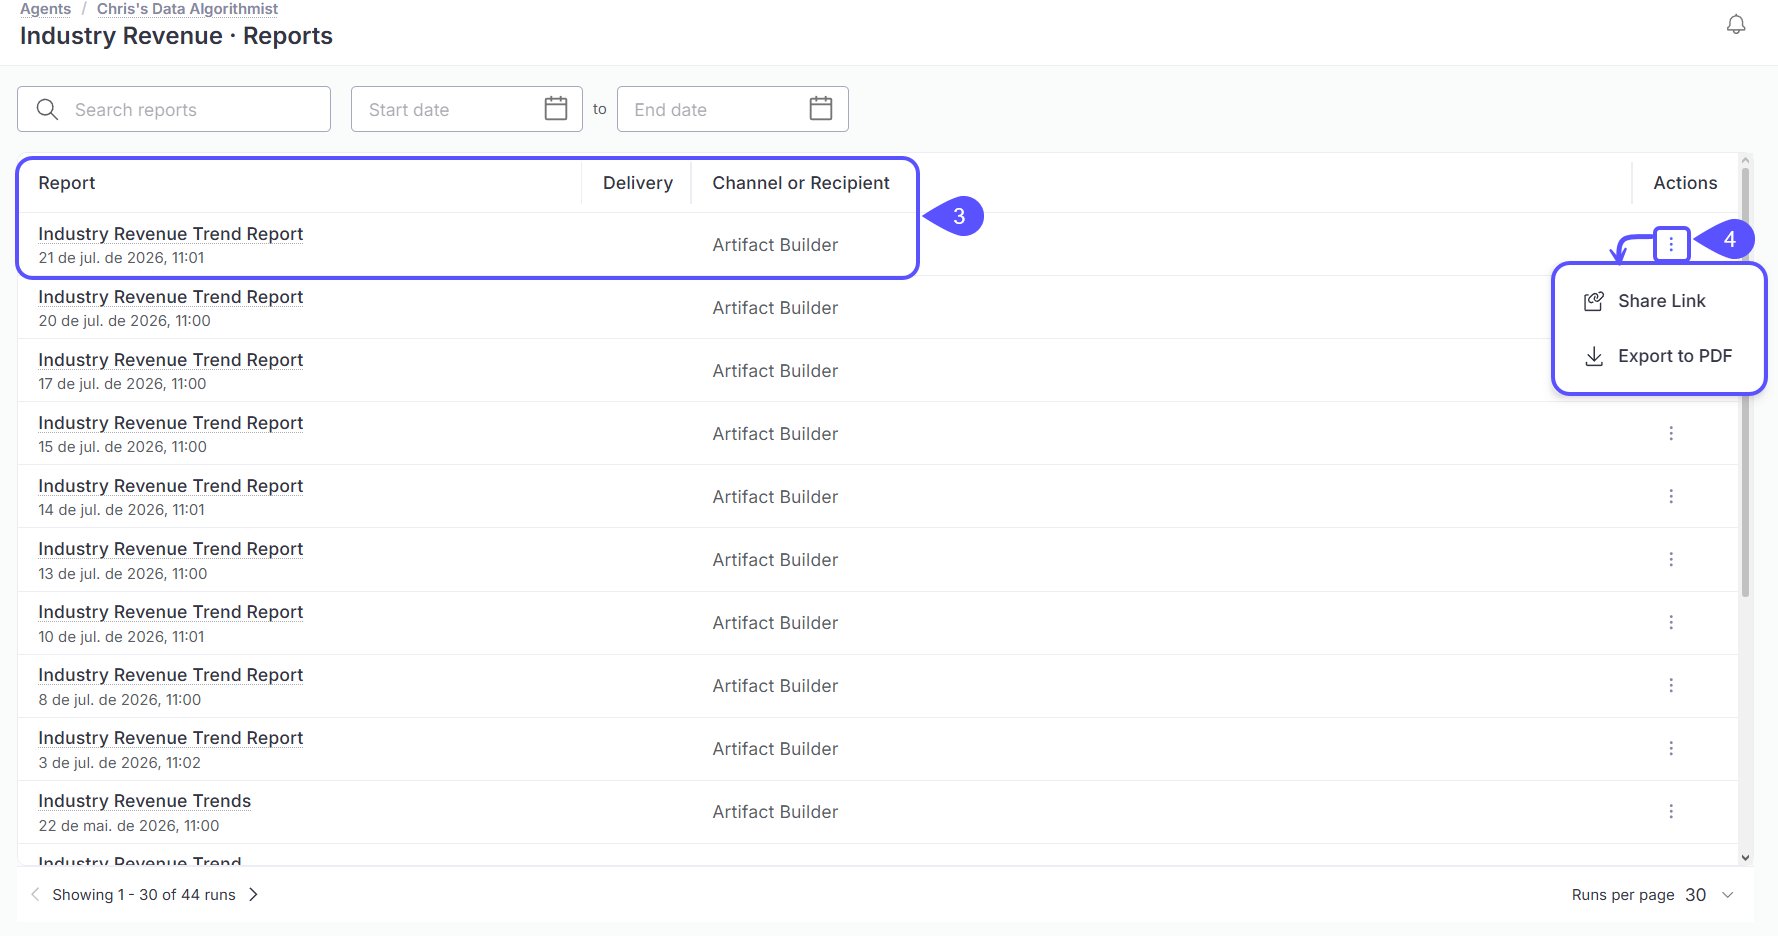
- Each row shows the report name and the date and time it ran, along with its Delivery method and Channel or Recipient.
- Click the three-dot menu next to a report to:
- Share Link: Copy a shareable link to that report.
- Export to PDF: Download the report as a PDF.
Next steps
Connect to Slack
Set up the Slack integration to receive notifications from your agents and dashboards.
Use Expert Mode
Perform in-depth investigations for complex questions and receive a detailed report.