- Add Data to a Domain (Admins)
- Create a Private Domain (Admins)
- Attach CSV as a Chat File (Admins/Explorers)
1. Add data to a Domain (Admins)
Admins can add new CSV files as tables or replace existing tables within a shared domain. This change affects the domain-level schema, meaning every Explorer assigned to that domain can query this data. Use this option to make a dataset available to your entire team. Follow the steps below to add data to a domain:- Navigate to Domains and select your target domain.
- Click the Data Sources tab.
- Click Add Table > from CSV file.
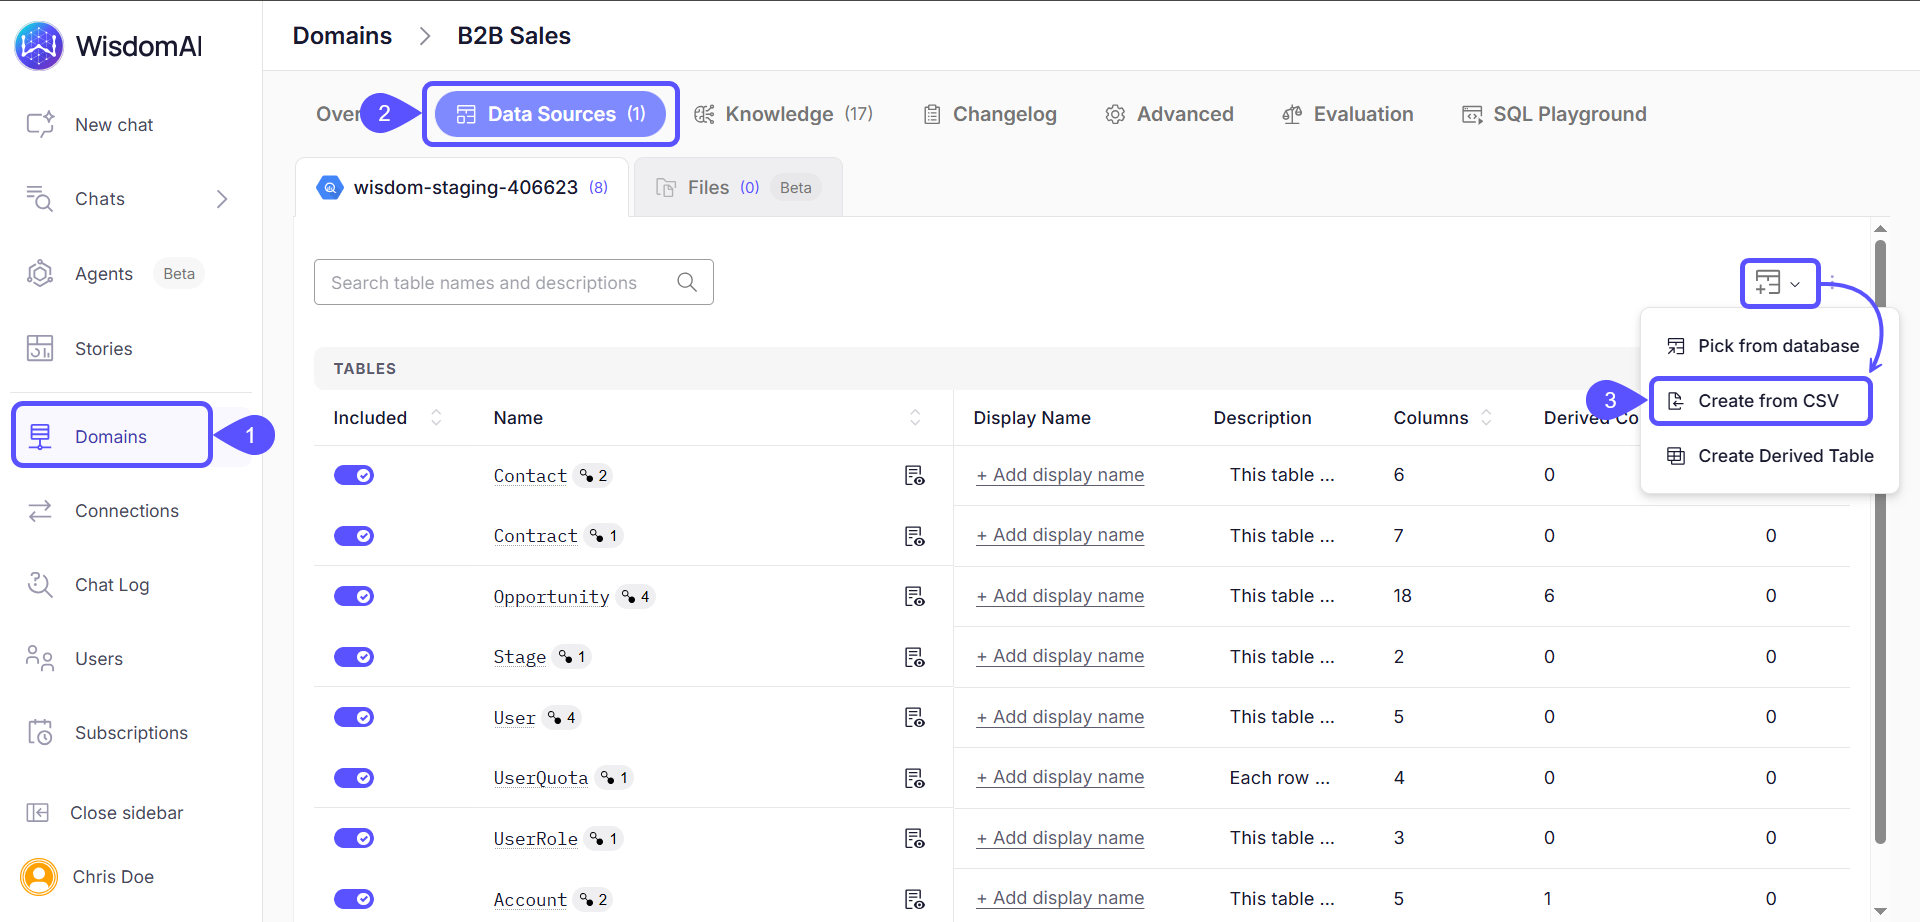
-
The domain will come set by default, while you will be able to select the Table Operation:
- Add as a new CSV Table: Creates a fresh table within the selected domain.
- Replace an existing CSV Table: Updates the data of a specific table while preserving settings.
-
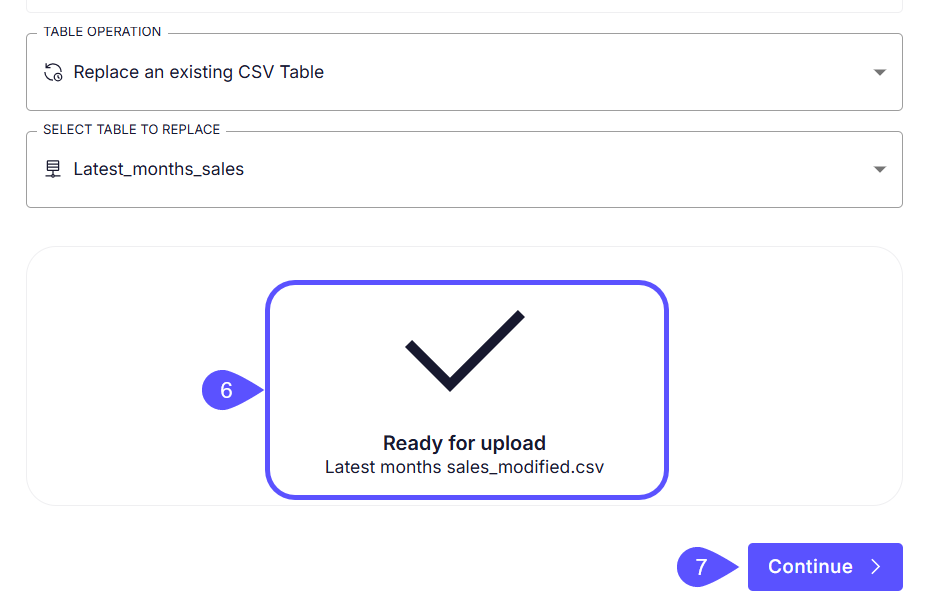
If replacing data, select the specific table to be replaced from the Select table to replace dropdown.
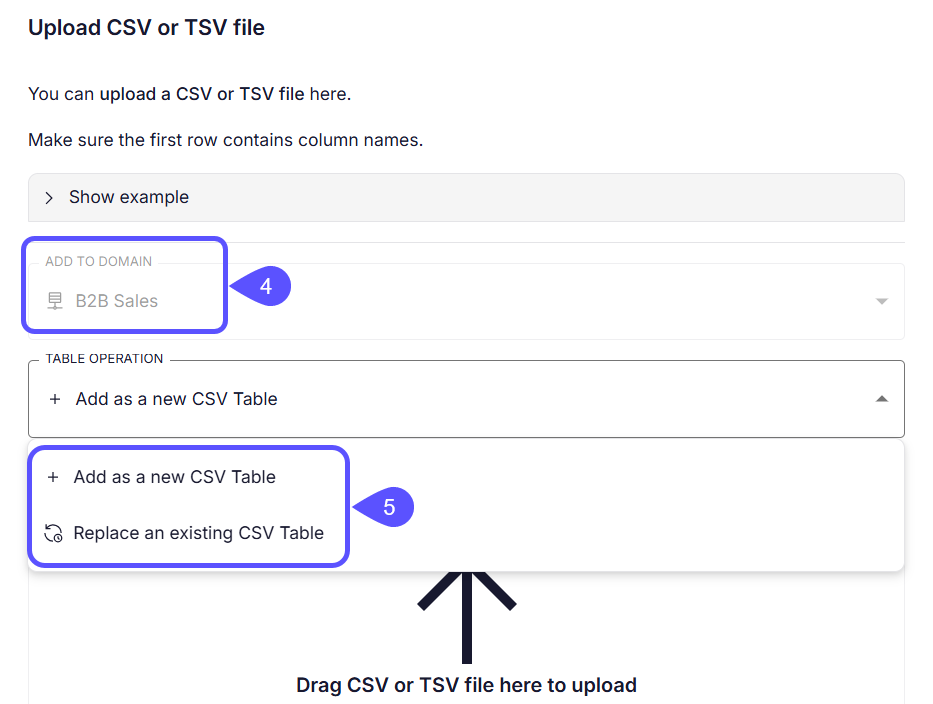
- Drag and drop your file into the upload area or click to browse.
- Click Continue.
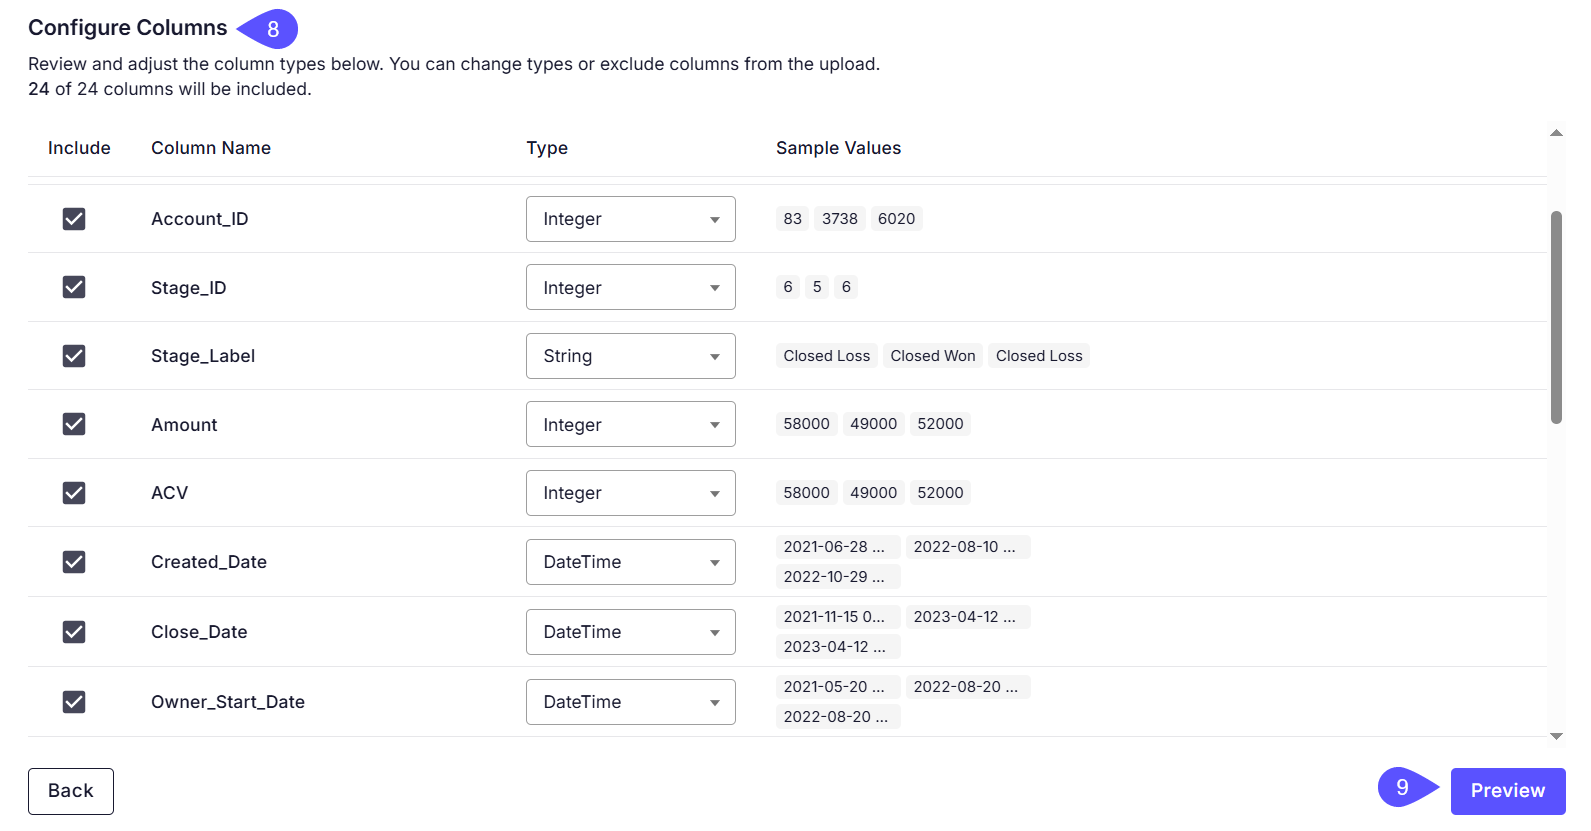
- Configure Columns: Review the detected column types (e.g., String, Integer). You can unmark the checkboxes to exclude specific columns from the upload.
- Click Preview.
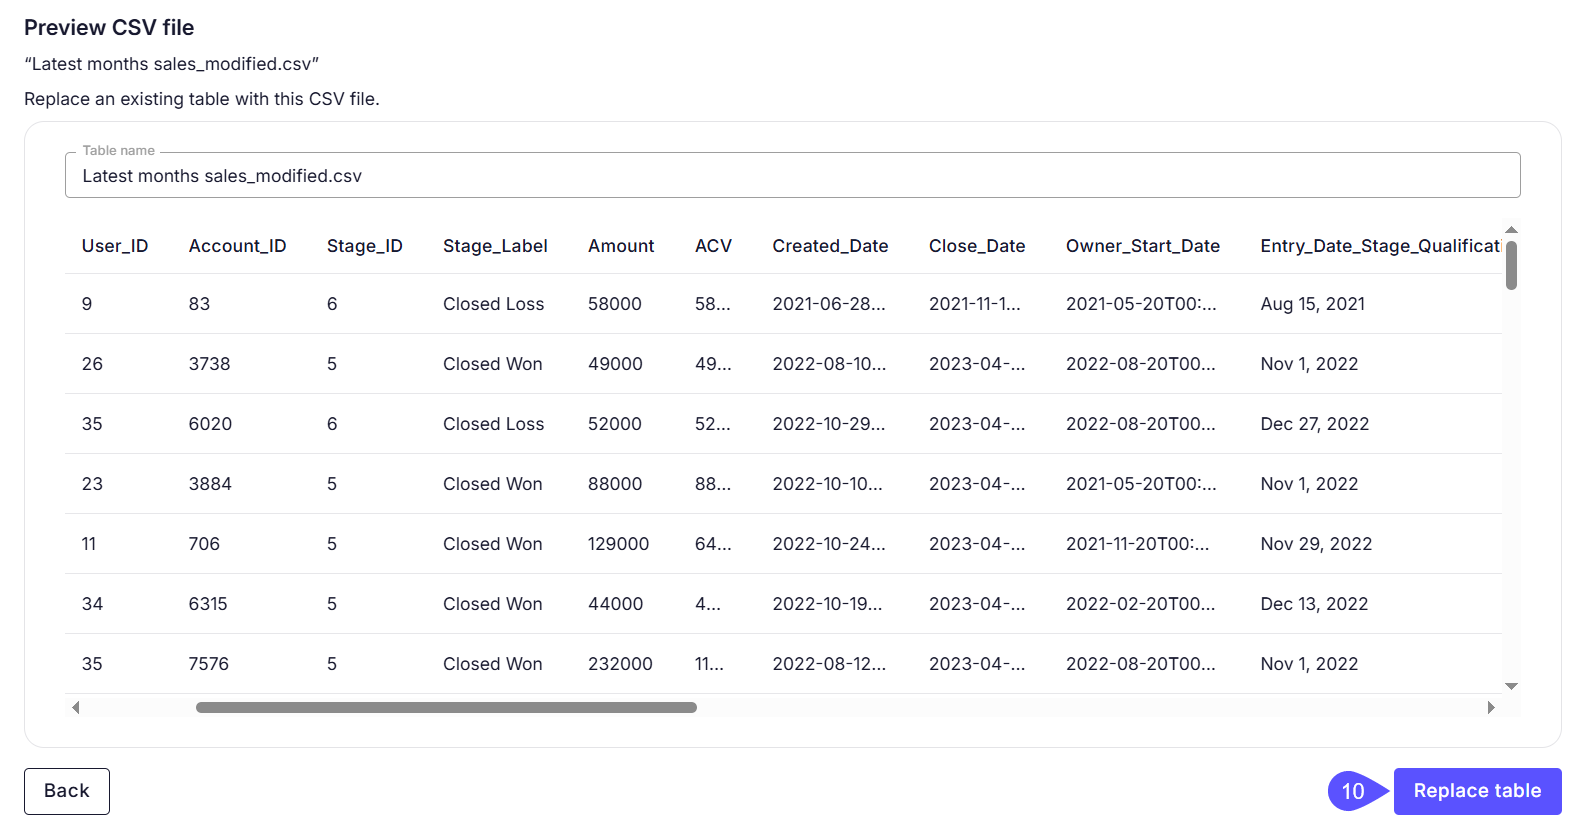
- Ensure the data in the preview grid maps correctly. Click Create table (or Replace table if updating an existing one).
Data Replacement BehaviorWhen you replace an existing CSV table, the system updates only the raw data. All existing column descriptions, settings, and domain configurations remain intact, only the table data itself is replaced.
2. Create a private Domain (Admins)
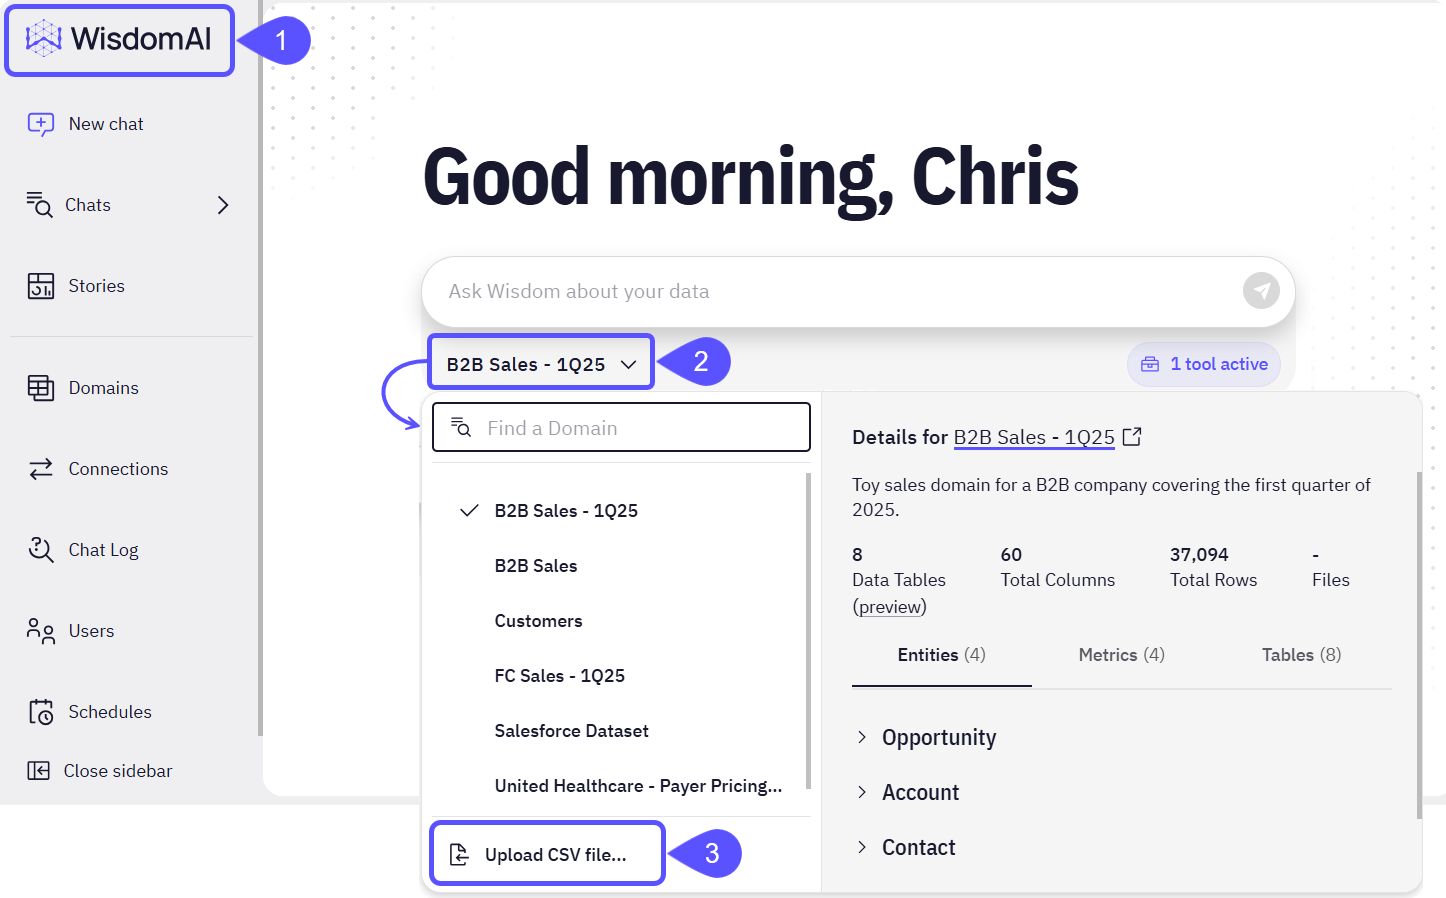
Admins can create their own domains by uploading a file. These domains are private by default, and no other user can see them unless the creator explicitly shares them. This method is great for one-off analysis or testing a dataset before sharing it. Follow the steps below to create a domain from the domain switcher:- Navigate to the homepage.
- Click the domain switcher.
- Select the Upload CSV file… option.
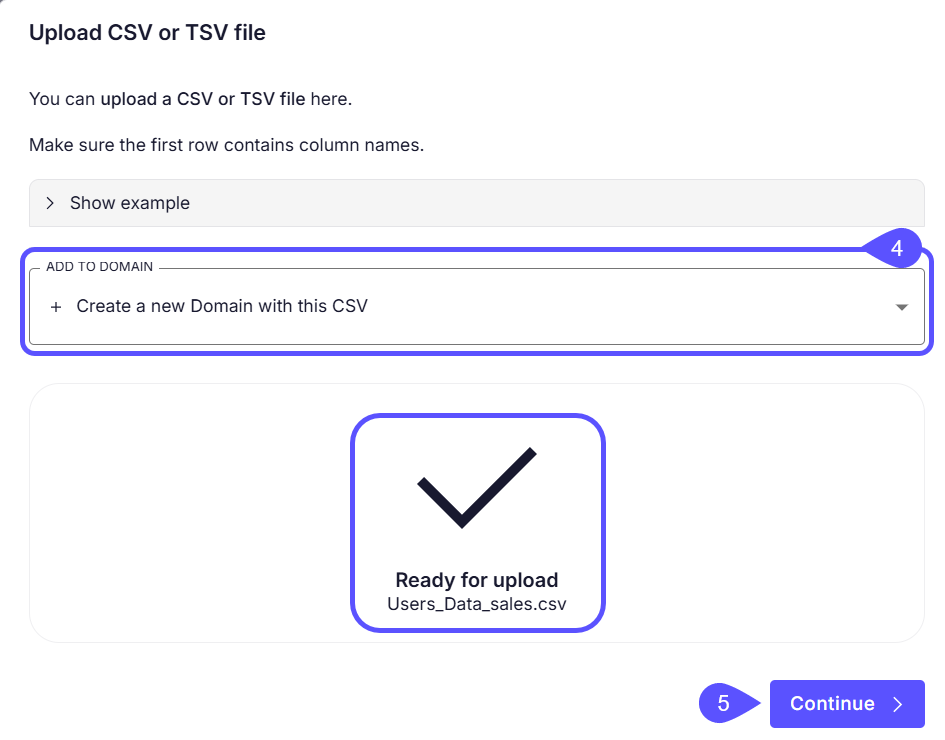
- In the Upload CSV or TSV file modal that opens, leave the default option + Create a New Domain with this CSV selected.
- Upload your files and click Continue.
- The Preview CSV file modal window opens. Click Configure columns to continue.
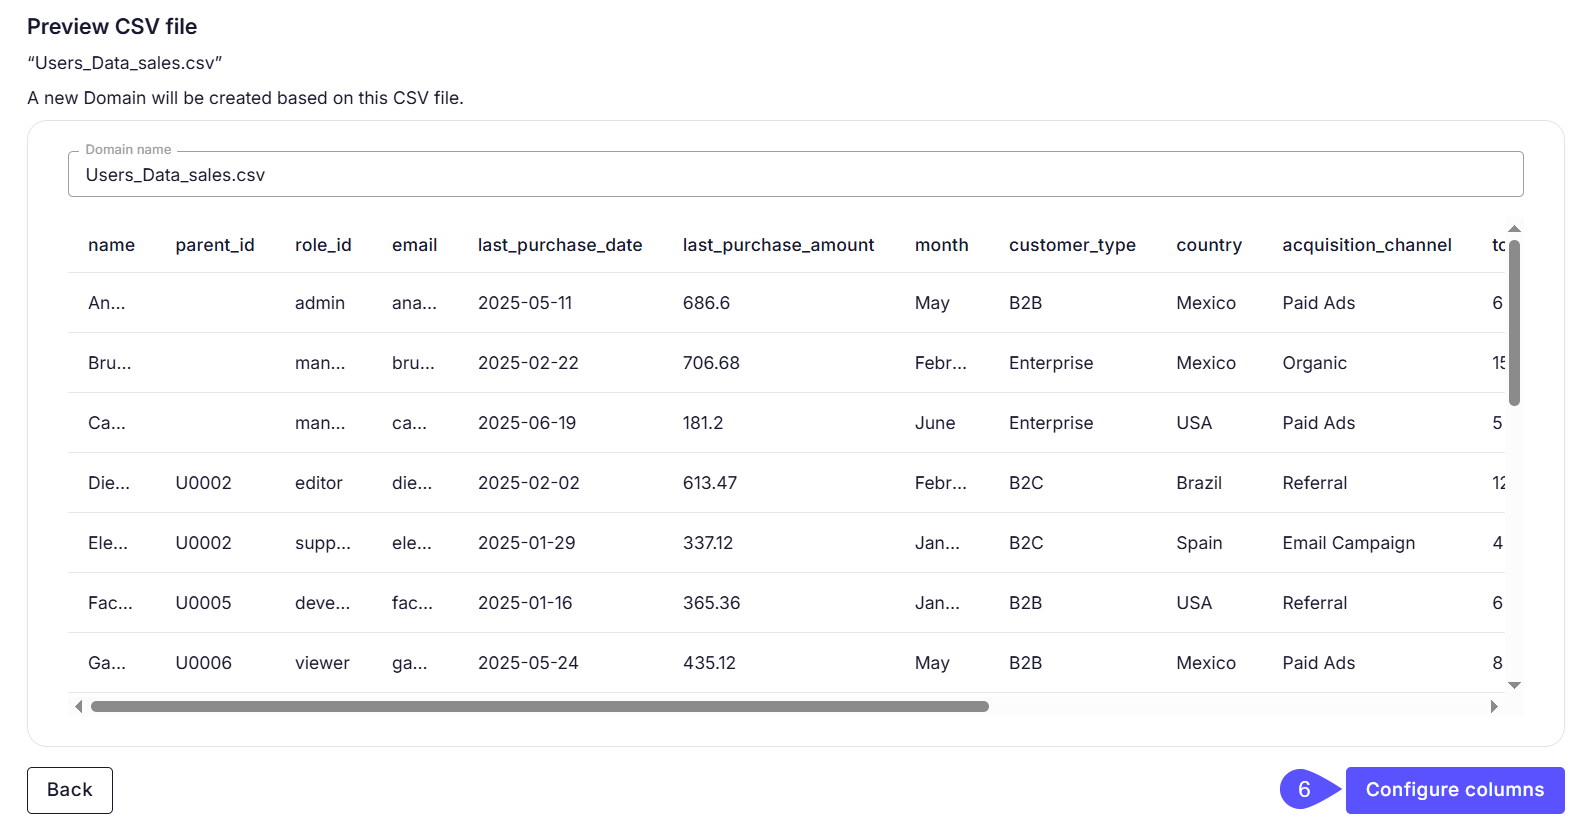
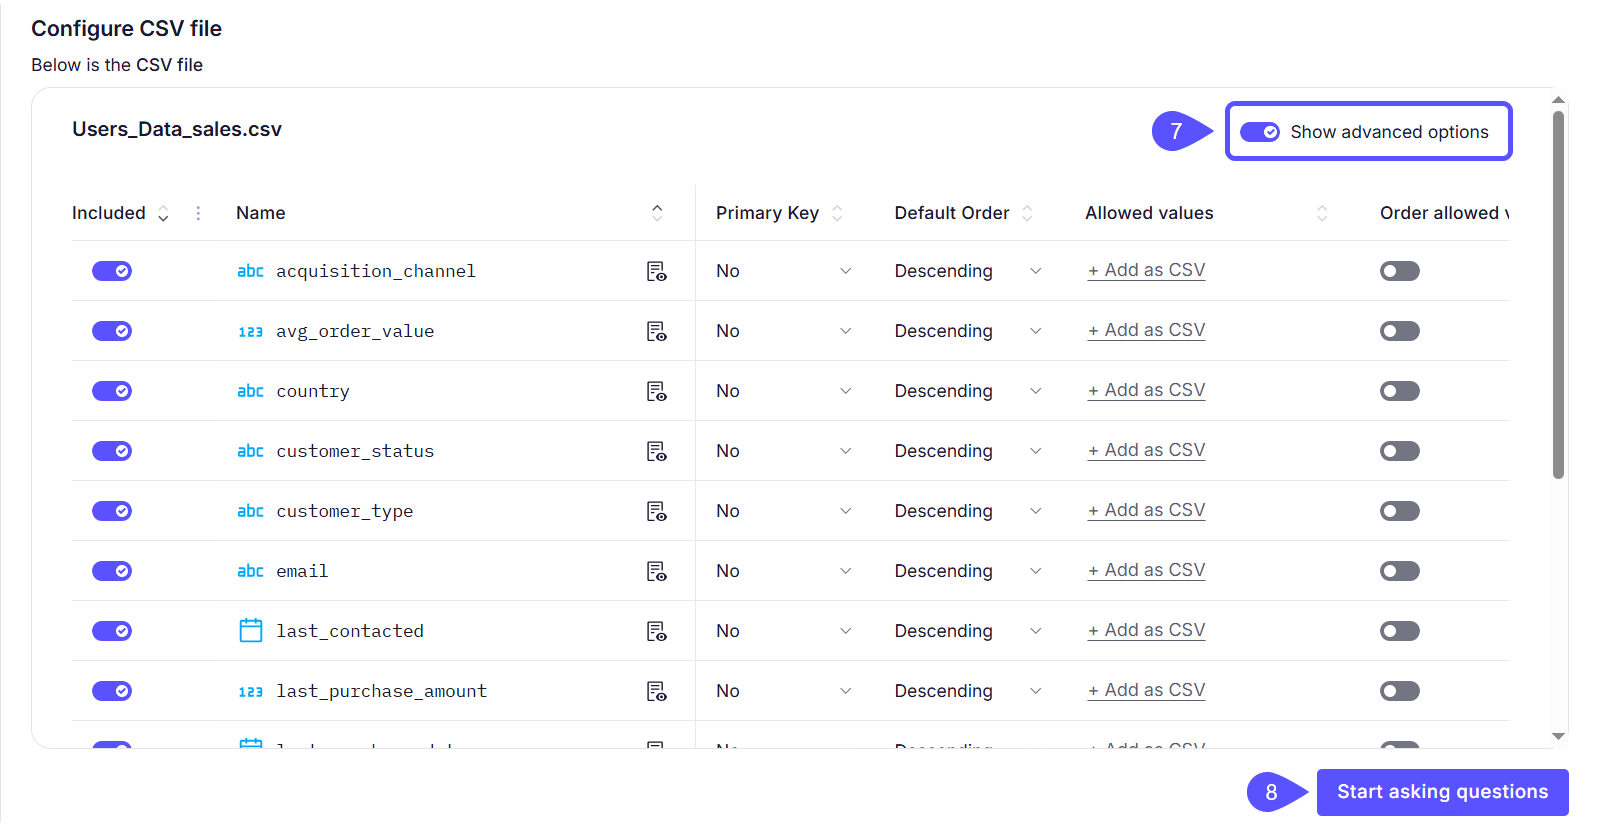
- The Configure CSV file modal opens, displaying a preview of all columns detected in your CSV file.
- When you’re done configuring the file, click Start asking questions. A chat opens where you can immediately begin querying your data.
3. Attach CSV as a chat file (Admins/Explorers)
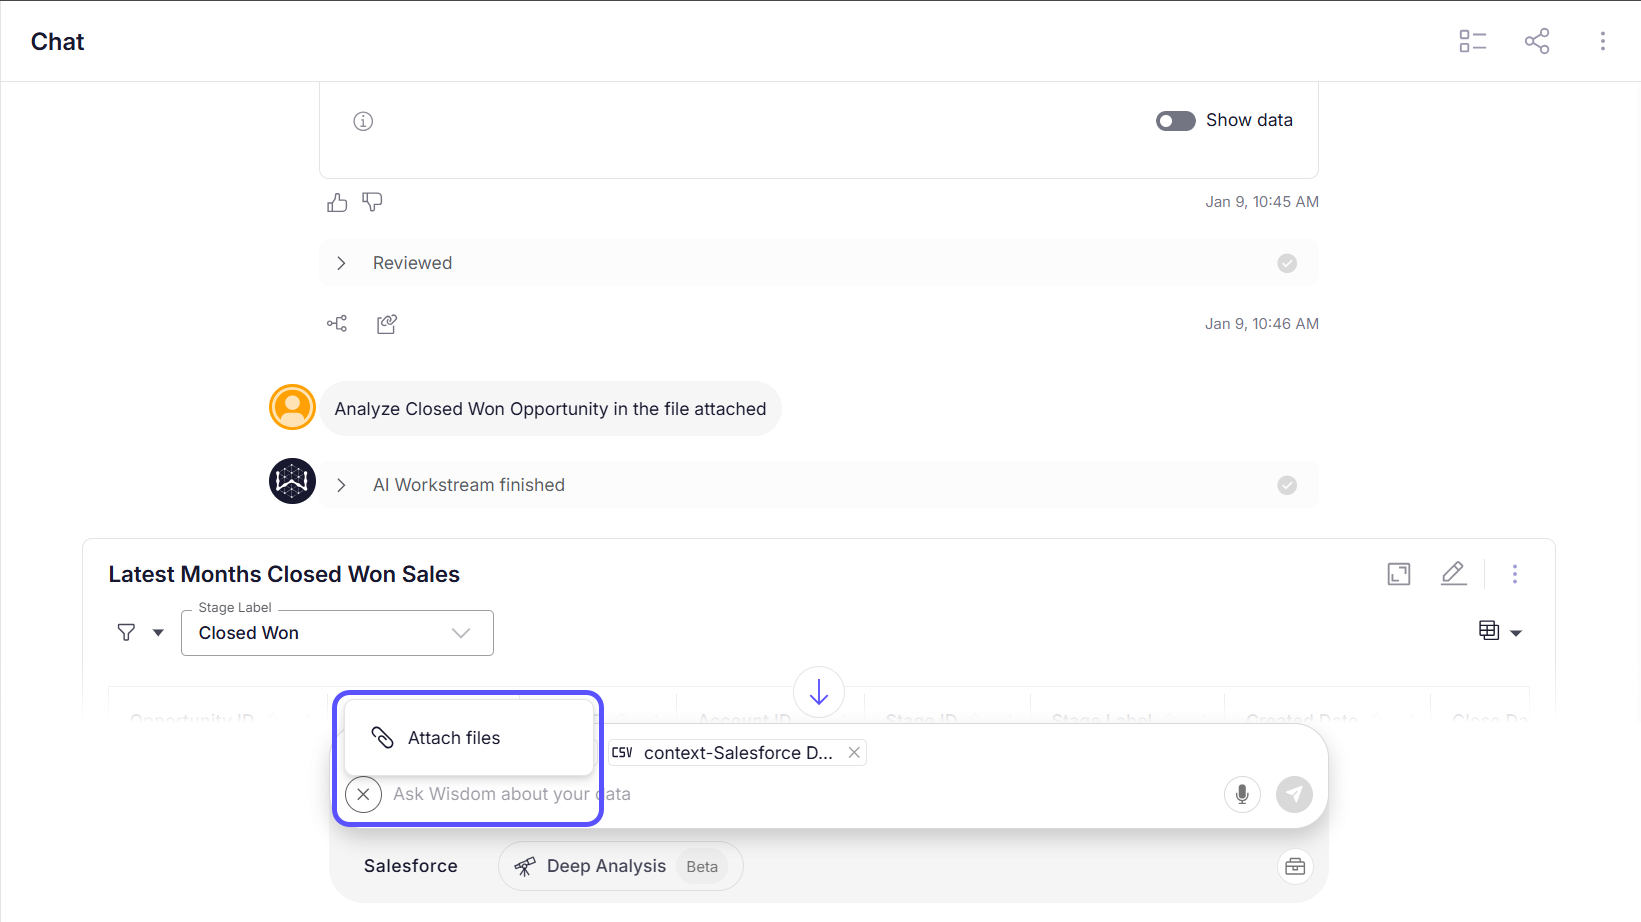
You can upload a file directly into a chat session. While the chat still uses your active domain for general context, the AI will prioritize the data in your uploaded file for that specific conversation. This upload method allows you to ask quick questions about a specific file without creating a new domain. Follow the steps below to attach a file to a chat:- Open any Chat.
- Click the Attachment (paperclip) icon in the message bar.
- Upload your file.
- Ask questions immediately (e.g., “Summarize the trends in this file”).
See Supported File Types for a complete list.
Next steps
Advanced Data Modeling
Define relationships and context in your data to enable more powerful analysis.
Validate and Test Answers
Understand the methods for verifying the correctness and reliability of generated answers.
Enhance Analysis with Business Knowledge
Improve analysis by providing custom business definitions, synonyms, and other contextual information.