Invite users
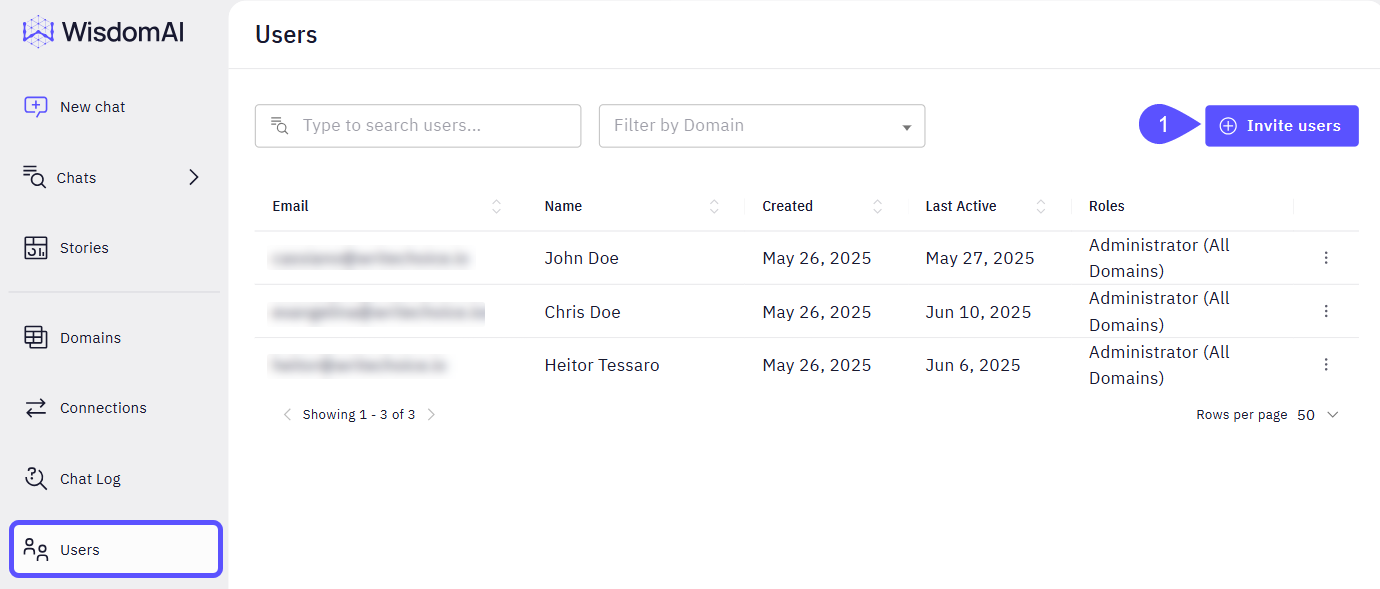
As an administrator, you can invite new users to join your WisdomAI environment via email.- Navigate to Users > Invite Users. The Invite Users modal window will open.
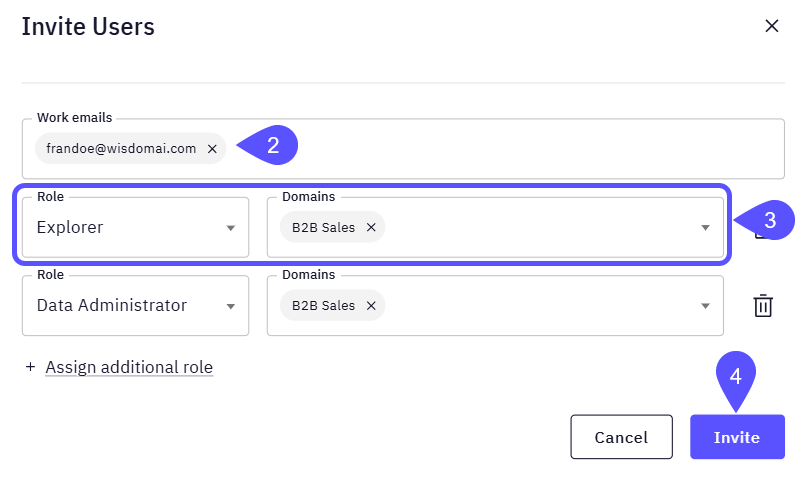
- Enter the email address of the person you want to invite.
- Assign the appropriate role and the corresponding Domain.
- You can assign more than one Role and Domain to a user.
- To delete any record, click on the bin icon.
- Click Invite.
Assign roles (individual)
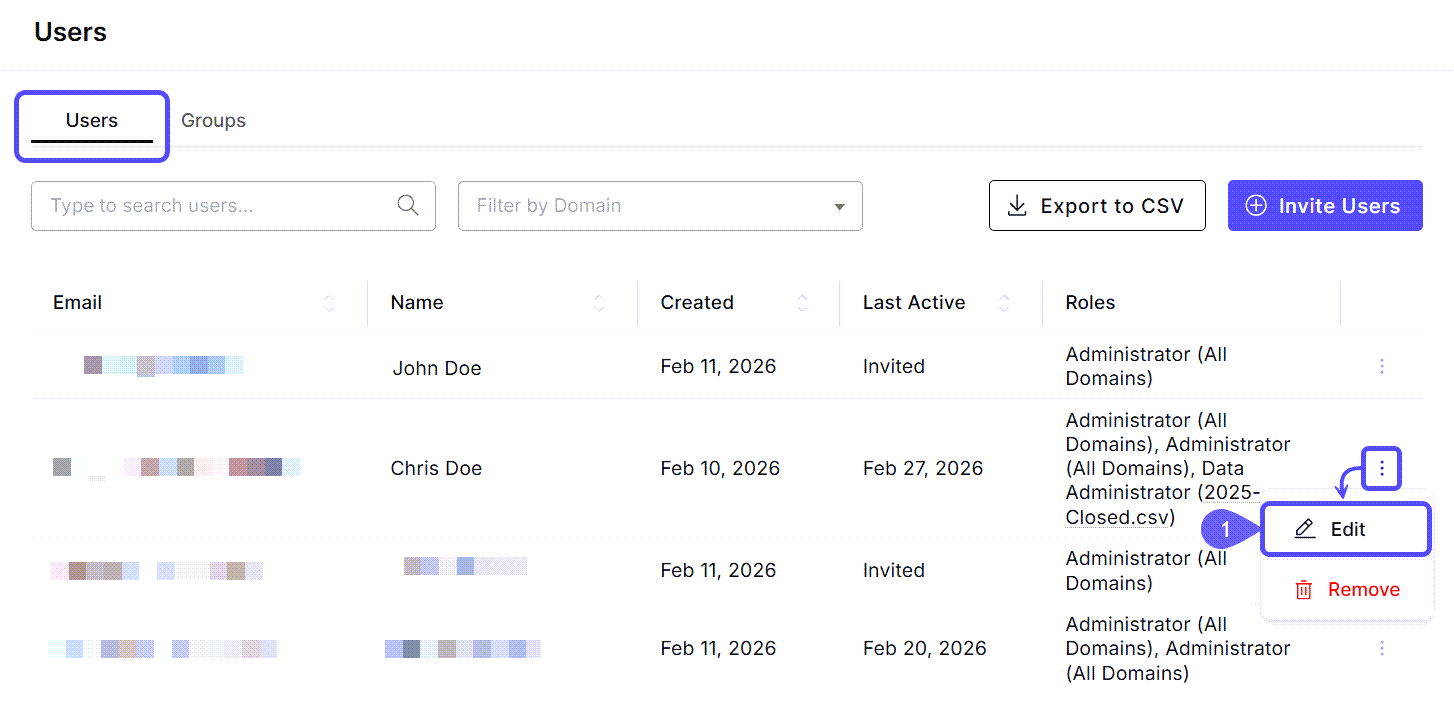
Roles may be managed on a per-user basis. Whether you need to add or change a user’s role, you can do it from the users list.- Navigate to Users > Find the user to assign/change the role, click on the kebab menu (three vertical dots) on its row, and select Edit. The Edit User modal window will open.
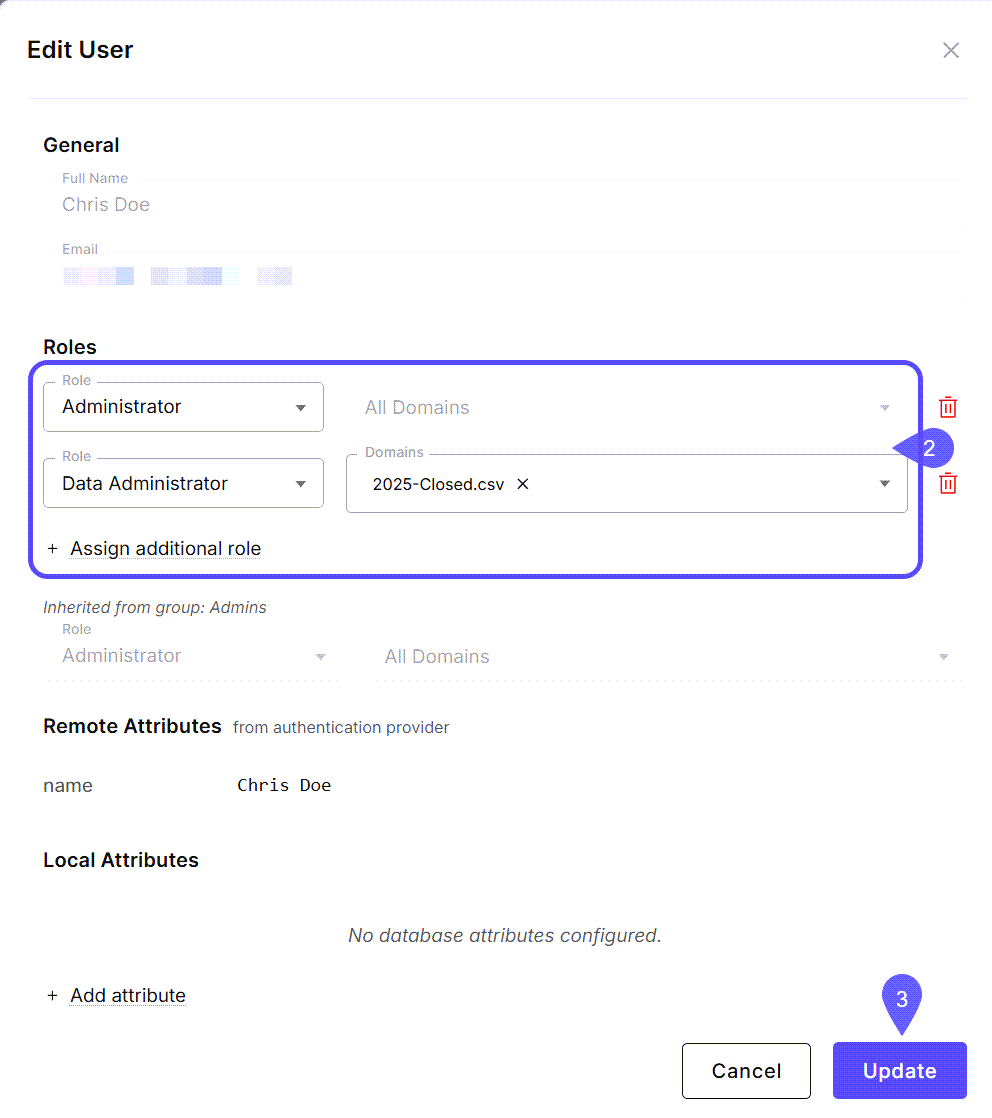
- Edit the Role/Domains information or assign an additional Role.
- You may also view Remote Attributes synced from a provider or add Local Attributes for the user.
- Click Update.
Manage user groups
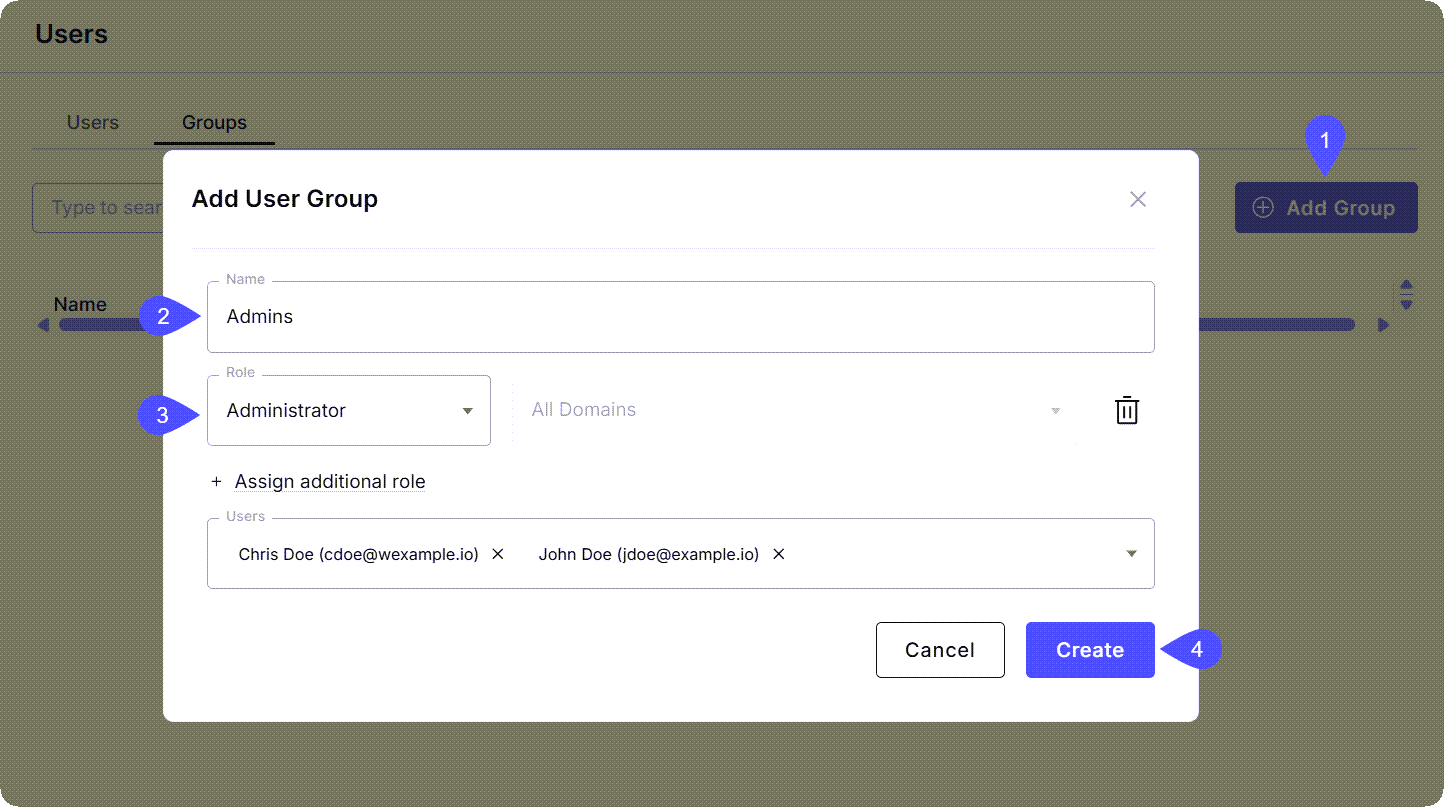
You can also create groups with roles to streamline management. Users will inherit any roles from the groups they belong to.- Navigate to Users > Groups and click Add Group.
-
In the Add User Group modal that opens, provide a name for the group (e.g.,
example_group). - Assign the Role(s) and Domain(s) that all group members should have.
-
Click Create.
- Assign users to these groups via the Edit User modal. When a user is in a group, their profile will show roles as Inherited from group.
Next steps
Automated Provisioning (JIT & SCIM)
Use Single Sign-On (SSO) to automate user account creation and synchronization.
Role Mapping & SSO Groups
Automate users’ permission levels by mapping Identity Provider (IdP) data to WisdomAI roles.
Row-Level Access Control
Learn how to restrict data access for specific users or roles at the row level.