

- Enable Auto Domain Selection (admin, one-time)
- Use Auto mode in chat
- Create a domain group (admin)
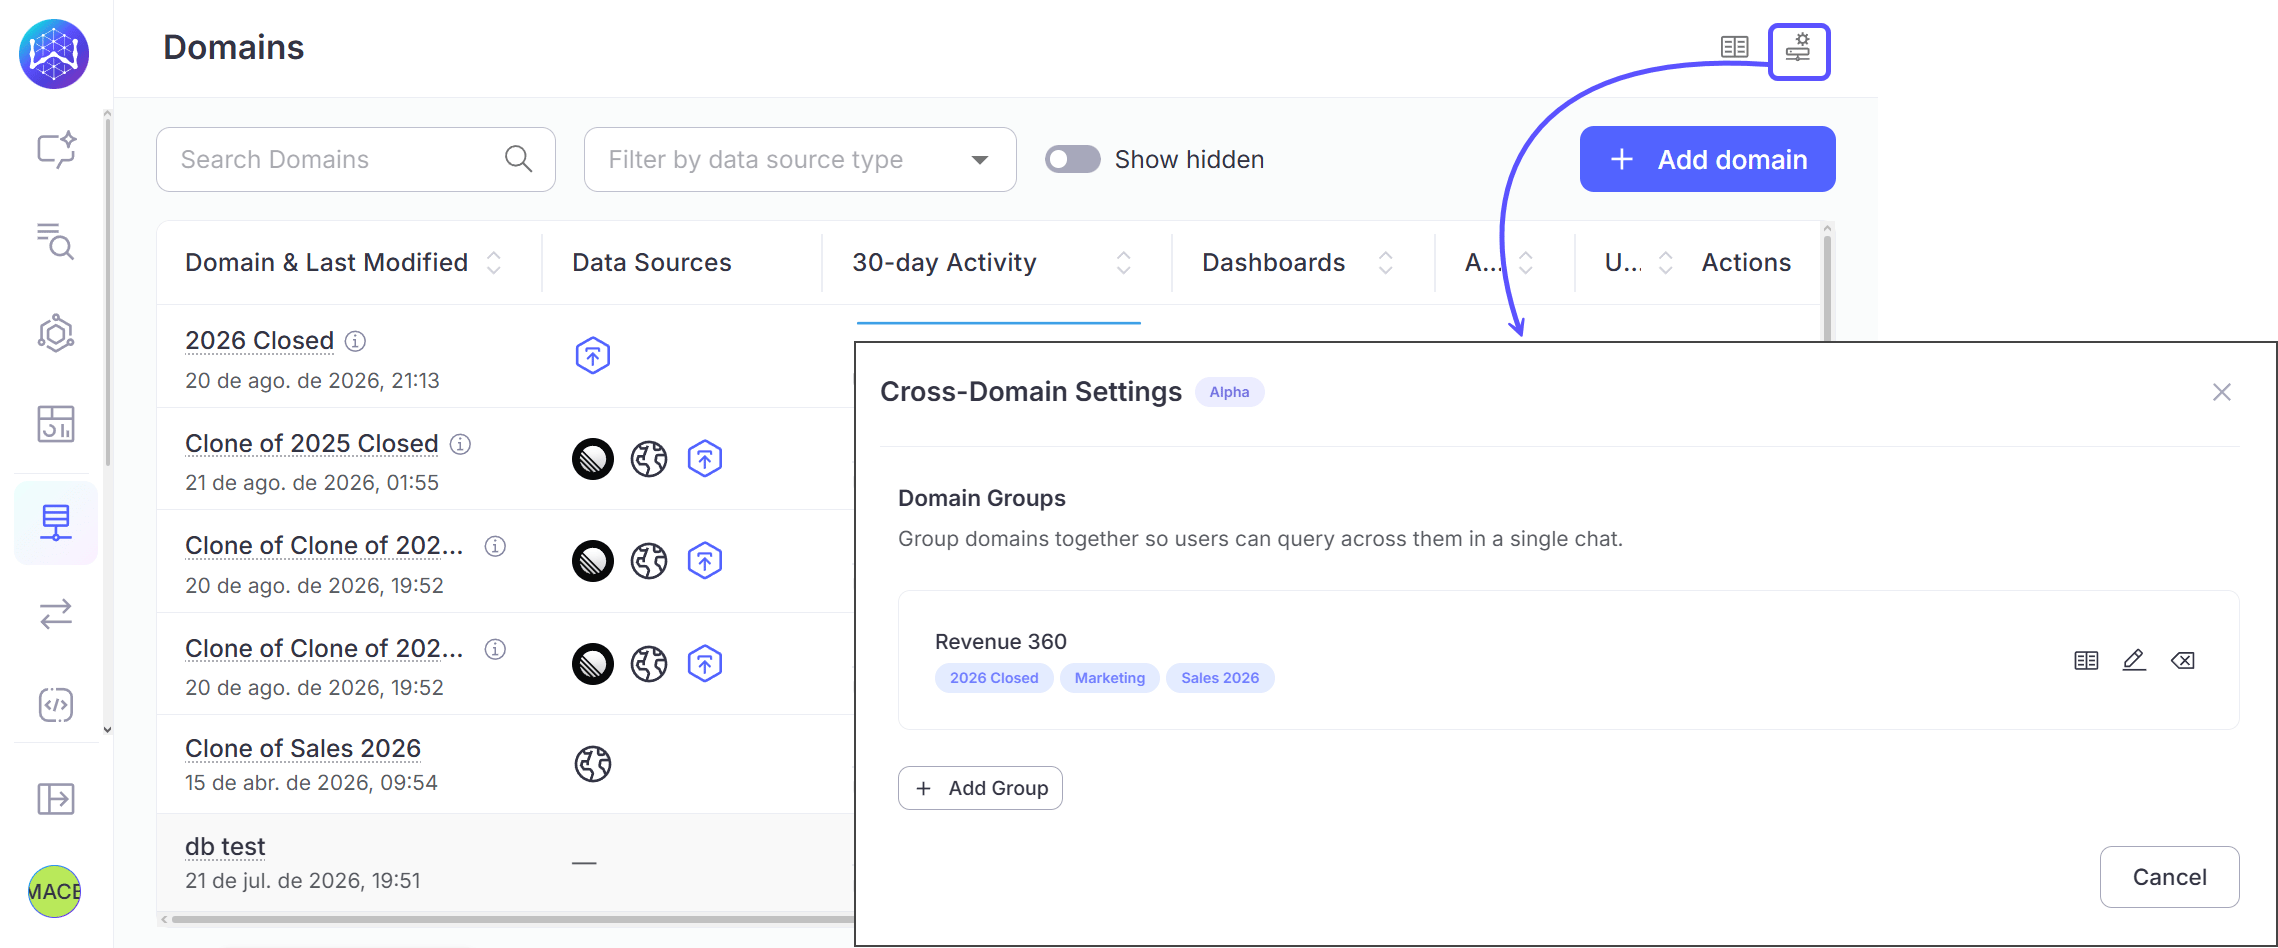
- Edit or delete a domain group (admin)
- Use a group in chat
- Add cross-domain context
- View the cross-domain reviewed query library
Enable Auto Domain Selection
A workspace admin must enable this feature before it’s available to anyone.- Go to Settings → Cross-Domain Settings → Auto Domain Selection
- Toggle Enable Auto Domain Selection on
- (Workspaces with more than 10 domains) Configure the Domain Greenlist: select the subset of domains WisdomAI is allowed to auto-select from. Required for large workspaces. Without it, Auto mode won’t be available.
The greenlist bounds the candidate pool coarsely. It doesn’t replace declaring specific domain relationships, that’s what Domain Groups are for.
Use Auto mode in chat
- Open the domain selector dropdown in chat
- Click Auto (sparkles icon)
- WisdomAI routes each question to the right domain or group automatically
Create a domain group
Only workspace admins can create domain groups. If the option is not visible in Settings, ask your admin.
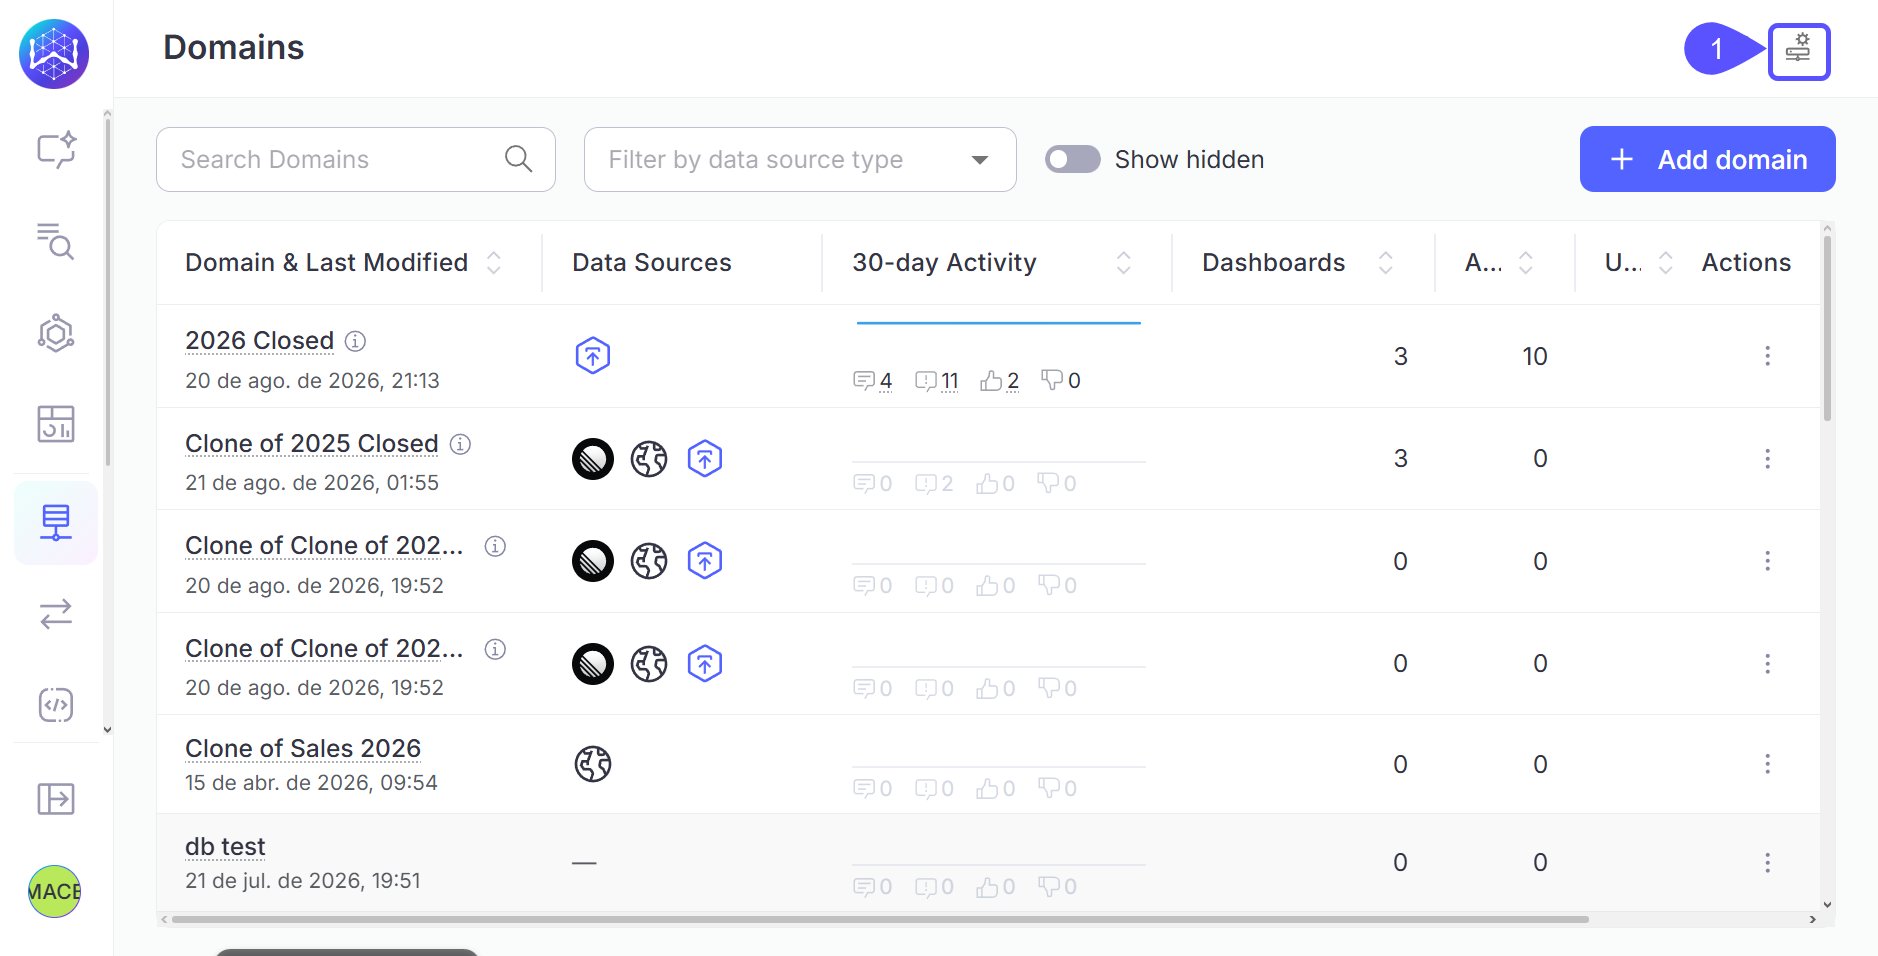
- Go to Settings → Cross-Domain Settings
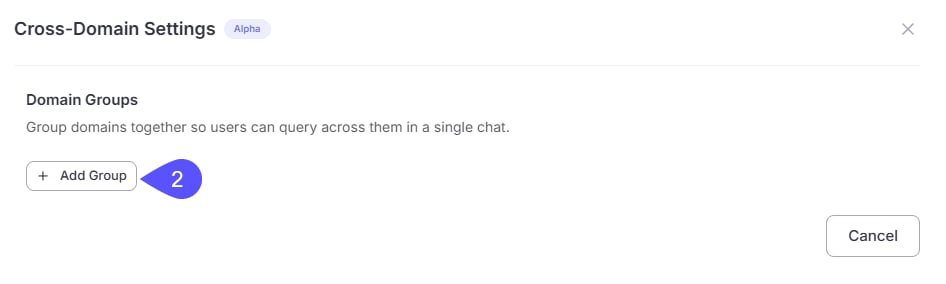
- Under Domain Groups, click Add Group
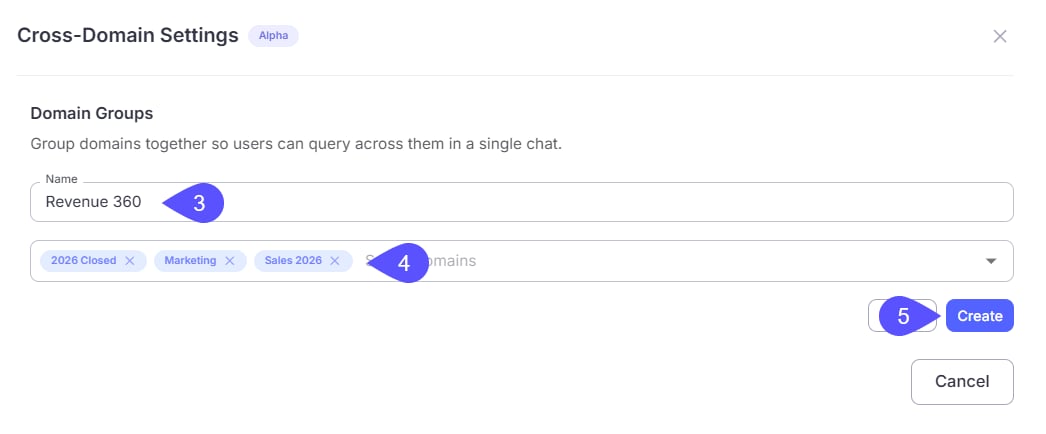
- Give the group a clear, business-oriented name (e.g., “Revenue 360” rather than “Salesforce + Stripe”)
- Select two or more domains from the picker
- Click Create
Edit or delete a domain group
Use a group in chat
- Open the domain selector at the top of the chat interface
- Select a group (marked with a Group chip)
- The conversation can now draw on any table from any domain in the group
Heads up: Queries that span multiple domains may take slightly longer, since WisdomAI reasons across a larger set of tables.
Add cross-domain context
Each domain in a group brings its own context library. That context explains individual domains, but not how the domains relate to each other. Use the Manage Context button to add context at the group level.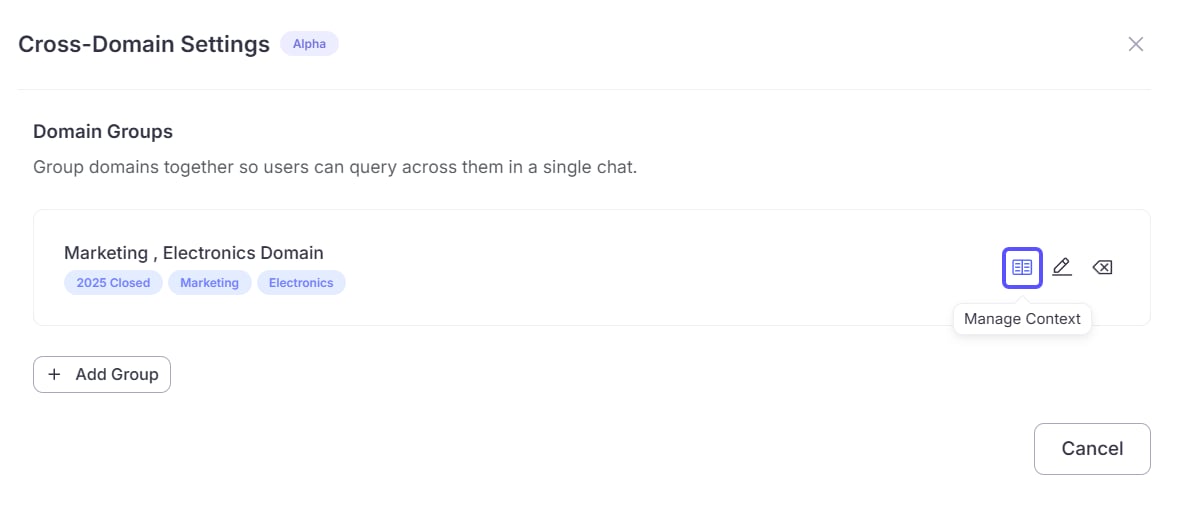
- Knowledge: Add guidance on how to use the combined domains together. For example, explain how datasets connect or which business rules apply across all domains in the group.
- Reviewed Queries: The group starts with reviewed queries inherited from all included base domains.
View the cross-domain reviewed query library
When you approve a response within a domain group using thumbs up, WisdomAI saves that query to a separate cross-domain reviewed query library. It does not appear in any individual domain’s context library. To view it, click the Manage Context button, then navigate to Cross-Domain Library → Reviewed Queries.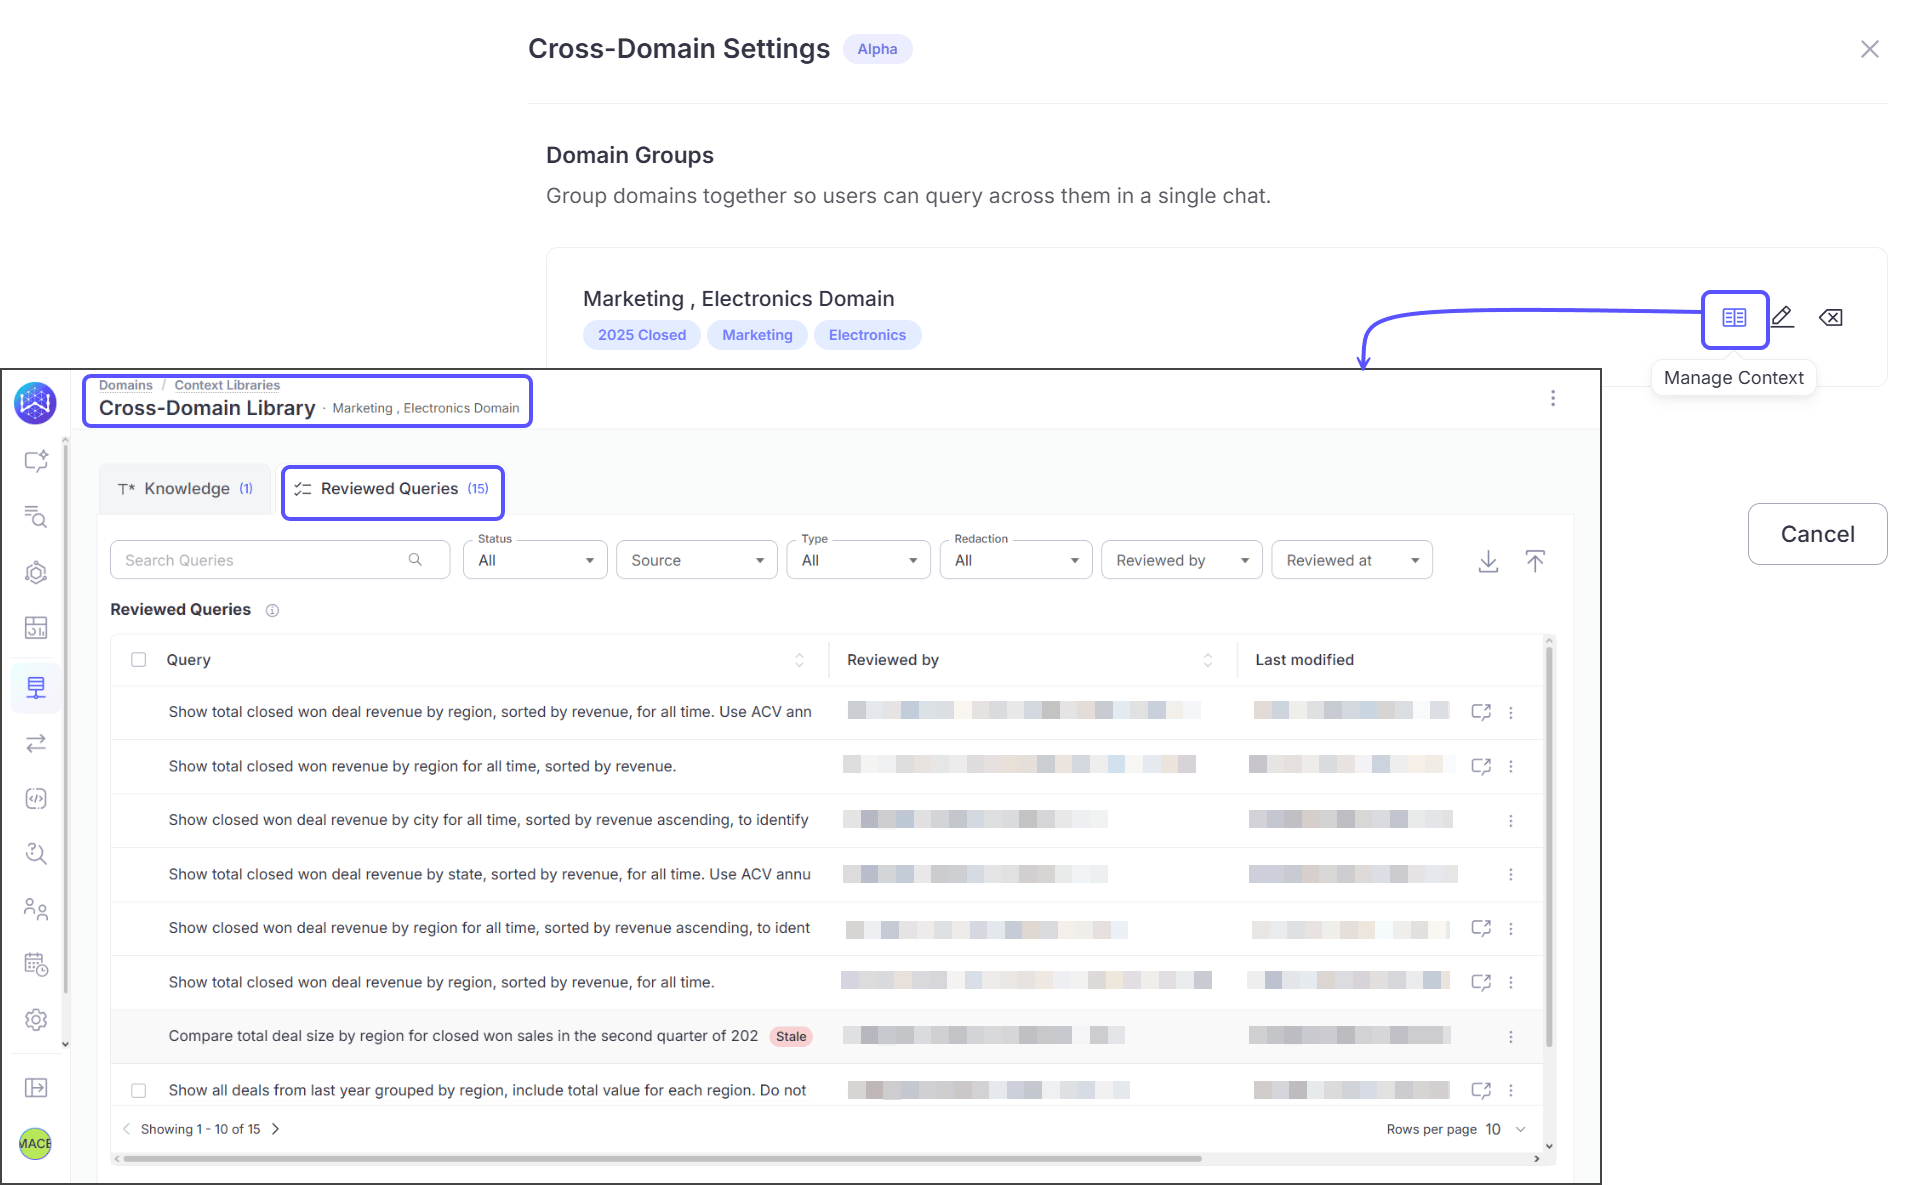
Quick Reference
Next steps
Domain Groups & Auto Domain Selection
Understand what these features are, how they differ, and when to use one over the other.
Provide Feedback to the System
Learn how to rate answers and provide corrections to improve the system’s accuracy.
Validate and Test Answers
Understand the methods for verifying the correctness and reliability of generated answers.