> ## Documentation Index
> Fetch the complete documentation index at: https://docs.wisdom.ai/llms.txt
> Use this file to discover all available pages before exploring further.
# Manual User Management
When Single Sign-On (SSO) is not enabled for your organization, users are managed manually through the **Users IAM page**. This article guides Administrators on how to invite users and assign permissions based on responsibilities.
## Invite users
As an administrator, you can invite new users to join your WisdomAI environment via email.
1. Navigate to **Users** > **Invite Users**. The Invite Users modal window will open.
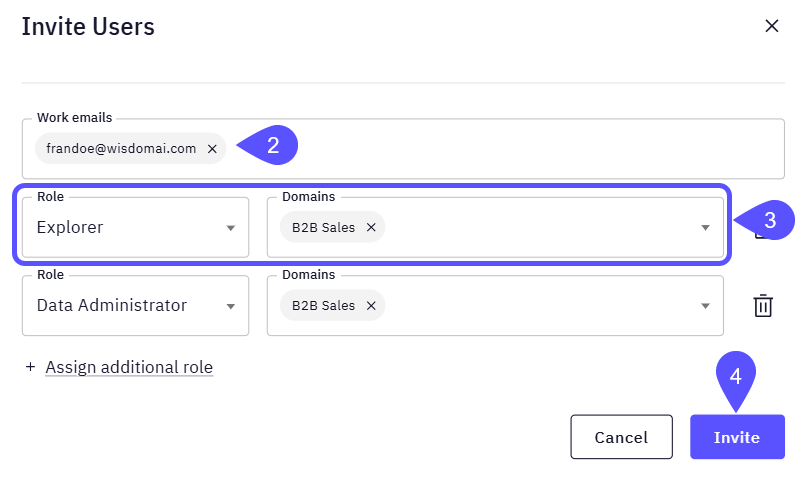
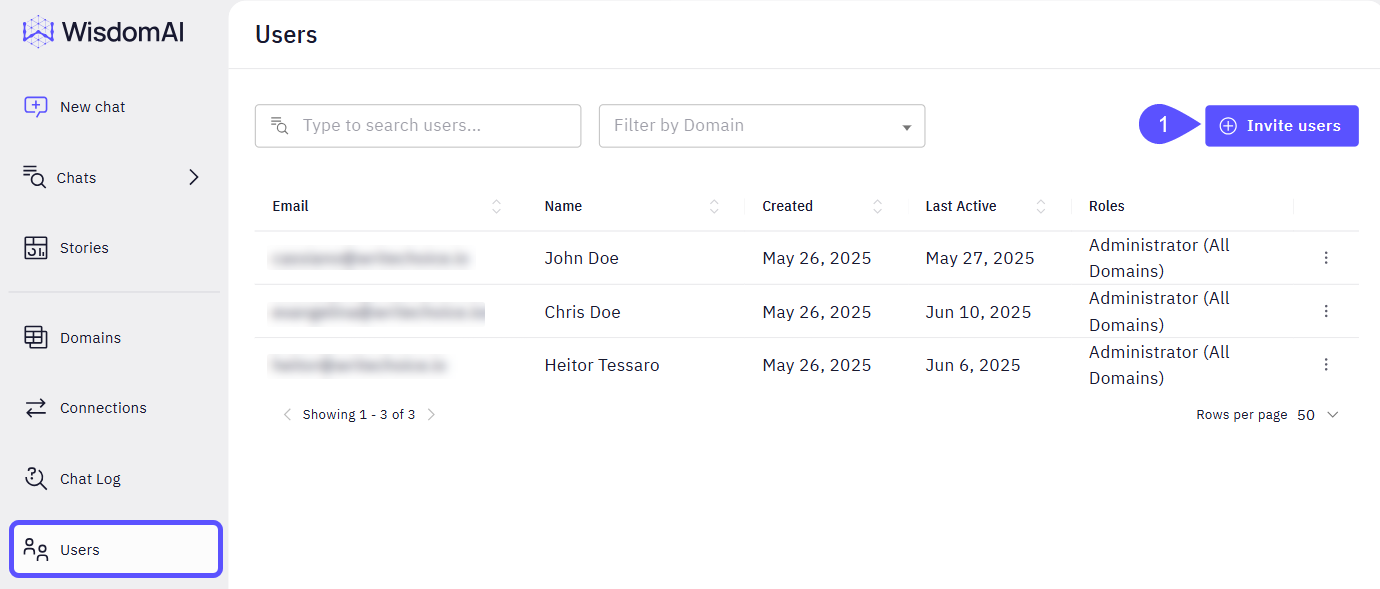 2. Enter the **email address** of the person you want to invite.
3. Assign the appropriate **role** and the corresponding **Domain**.
* You can assign more than one Role and Domain to a user.
* To delete any record, click on the bin icon.
4. Click **Invite**.
Assign roles carefully based on user responsibilities. Role-based access control ensures users only access the data and features they need.
2. Enter the **email address** of the person you want to invite.
3. Assign the appropriate **role** and the corresponding **Domain**.
* You can assign more than one Role and Domain to a user.
* To delete any record, click on the bin icon.
4. Click **Invite**.
Assign roles carefully based on user responsibilities. Role-based access control ensures users only access the data and features they need.
 ## Assign roles (individual)
Roles may be managed on a per-user basis. Whether you need to add or change a user's role, you can do it from the users list.
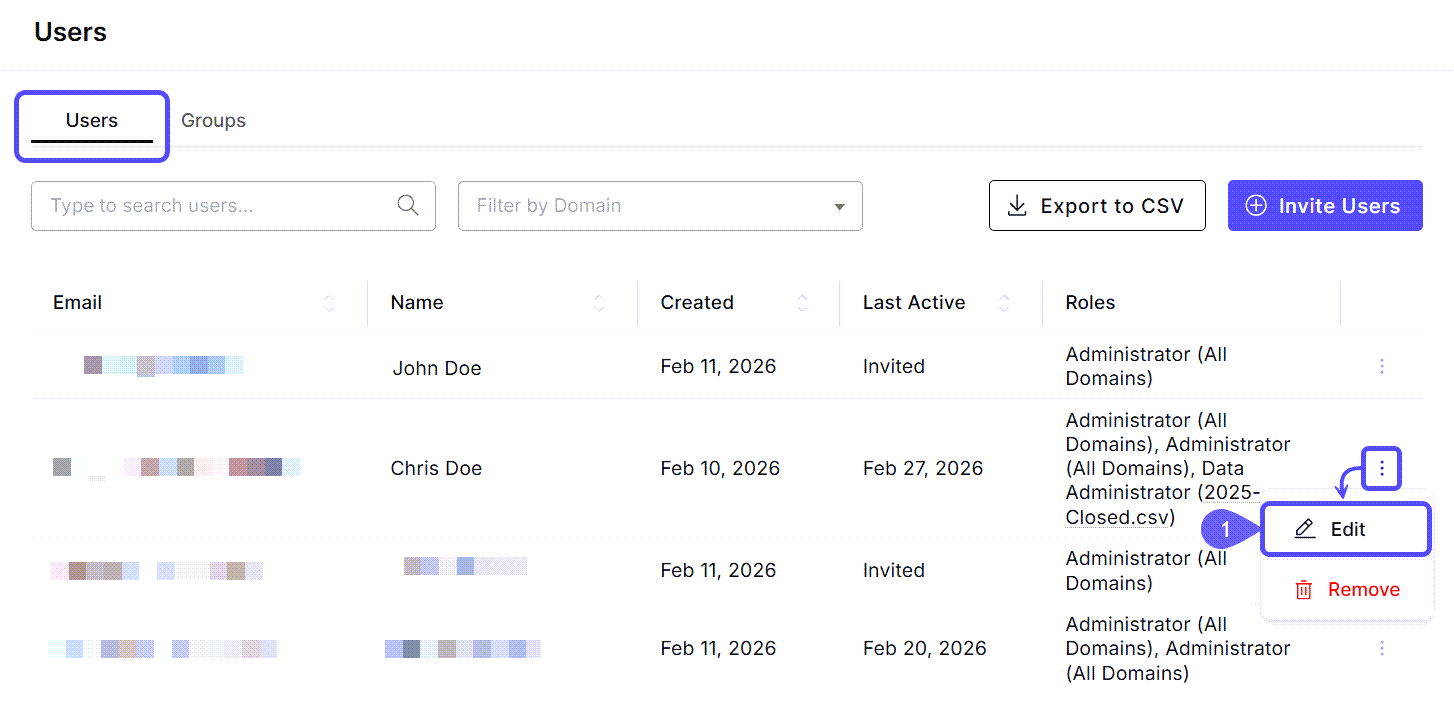
1. Navigate to **Users** > Find the user to assign/change the role, click on the kebab menu (three vertical dots) on its row, and select **Edit**. The Edit User modal window will open.
## Assign roles (individual)
Roles may be managed on a per-user basis. Whether you need to add or change a user's role, you can do it from the users list.
1. Navigate to **Users** > Find the user to assign/change the role, click on the kebab menu (three vertical dots) on its row, and select **Edit**. The Edit User modal window will open.
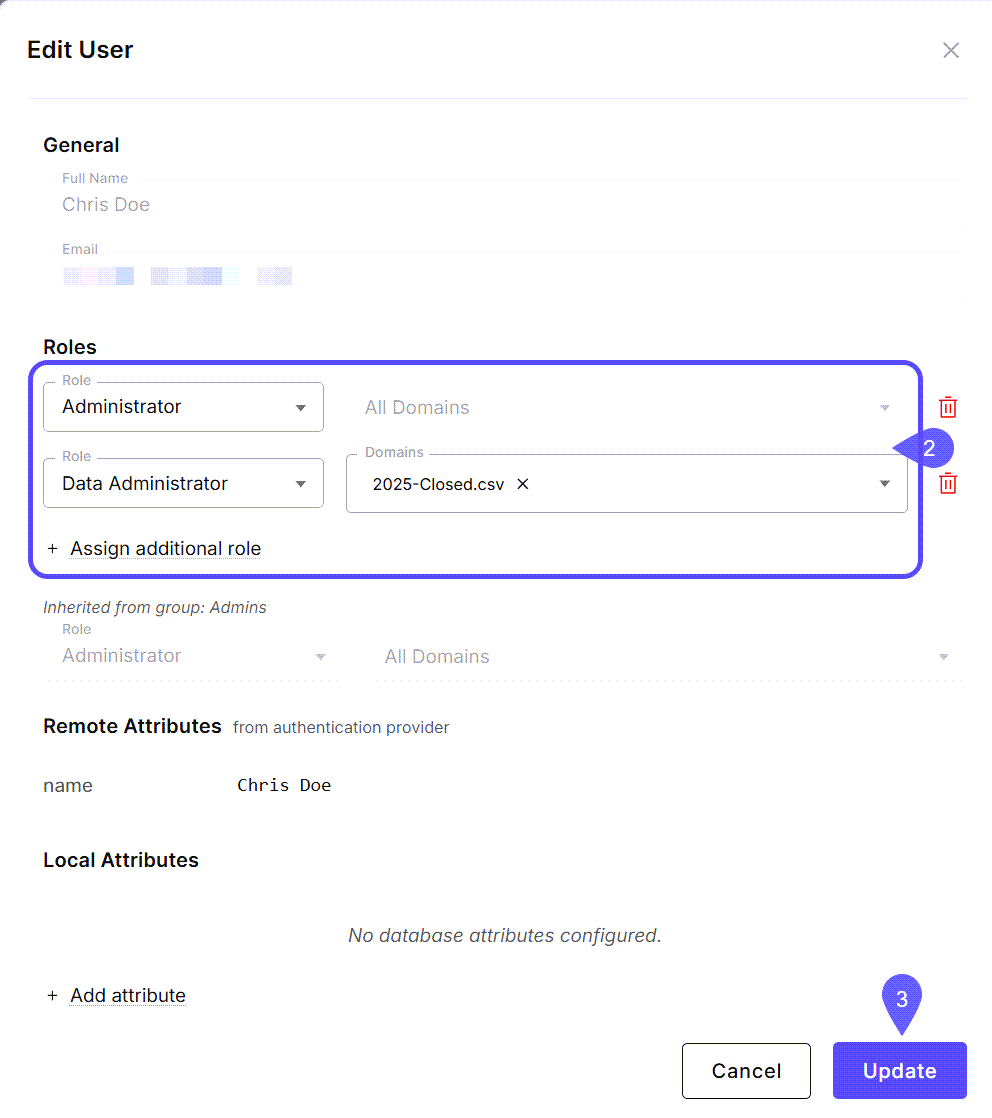
 2. **Edit** the Role/Domains information or **assign an additional Role**.
* You may also view **Remote Attributes** synced from a provider or add **Local Attributes** for the user.
3. Click **Update**.
2. **Edit** the Role/Domains information or **assign an additional Role**.
* You may also view **Remote Attributes** synced from a provider or add **Local Attributes** for the user.
3. Click **Update**.
 ## Manage user groups
You can also create groups with roles to streamline management. Users will inherit any roles from the groups they belong to.
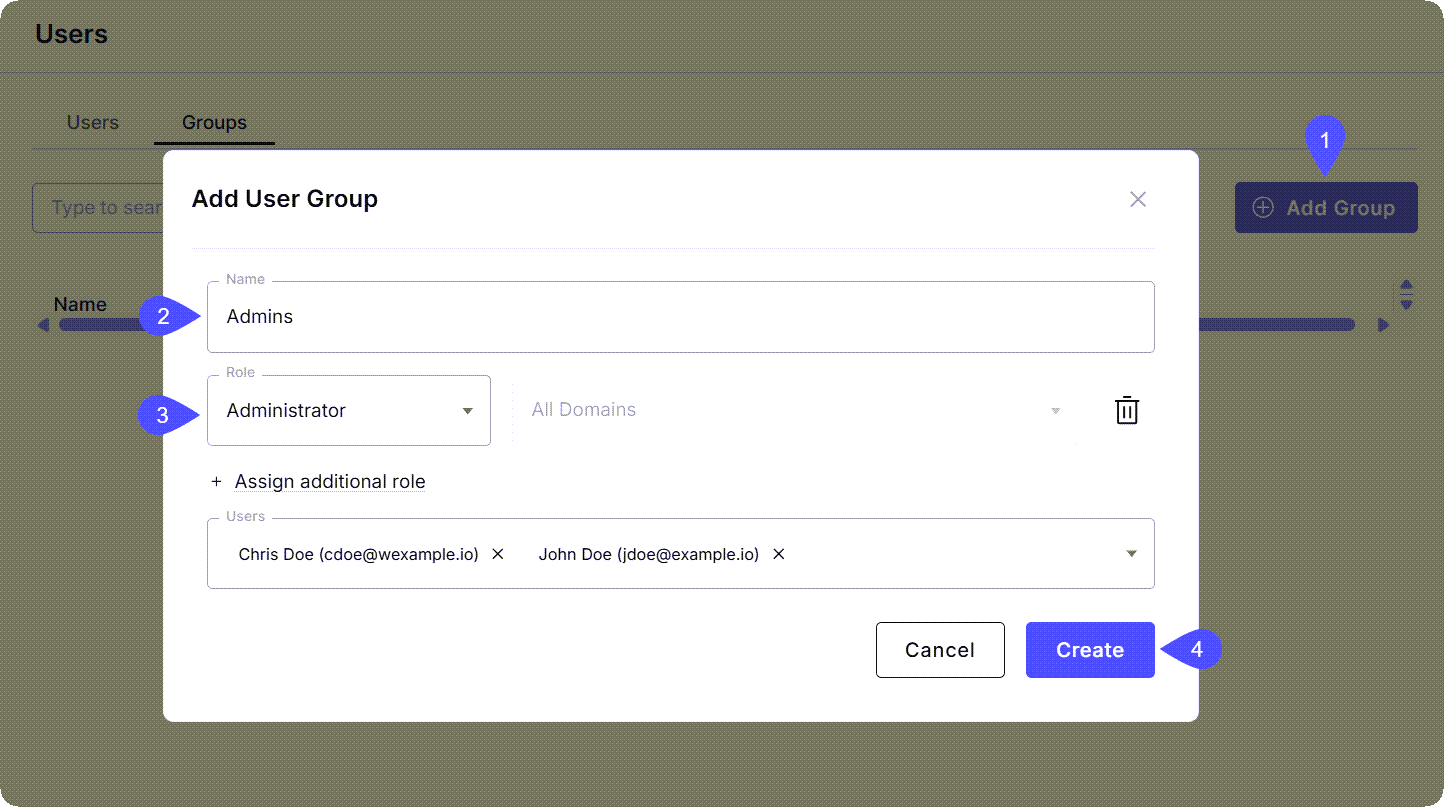
1. Navigate to **Users > Groups** and click **Add Group**.
2. In the **Add User Group** modal that opens, provide a name for the group (e.g., `example_group`).
3. Assign the **Role(s)** and **Domain(s)** that all group members should have.
4. Click **Create**.
## Manage user groups
You can also create groups with roles to streamline management. Users will inherit any roles from the groups they belong to.
1. Navigate to **Users > Groups** and click **Add Group**.
2. In the **Add User Group** modal that opens, provide a name for the group (e.g., `example_group`).
3. Assign the **Role(s)** and **Domain(s)** that all group members should have.
4. Click **Create**.
 5. Assign users to these groups via the **Edit User** modal. When a user is in a group, their profile will show roles as **Inherited from group**.
## Next steps
Use Single Sign-On (SSO) to automate user account creation and synchronization.
Automate users' permission levels by mapping Identity Provider (IdP) data to WisdomAI roles.
Learn how to restrict data access for specific users or roles at the row level.
5. Assign users to these groups via the **Edit User** modal. When a user is in a group, their profile will show roles as **Inherited from group**.
## Next steps
Use Single Sign-On (SSO) to automate user account creation and synchronization.
Automate users' permission levels by mapping Identity Provider (IdP) data to WisdomAI roles.
Learn how to restrict data access for specific users or roles at the row level.